Monday, September 12, 2011

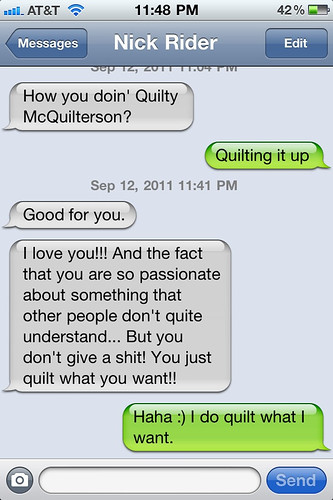
I love this guy.

I love this guy. by A Little Gray
I love this guy., a photo by A Little Gray on Flickr.


He works late. I quilt late. This was our conversation tonight.

(and yes, he is referencing the honey badger.)


Saturday, September 10, 2011

LTTSA: Penguin Backpack- the Zipper

... dun dun dun!

Just kidding. This zipper is going to go in like butter. Let's do this thing.


We are going to start on page 55 where it says "Insert the zipper." (duh.) Putting together the front and back panels of the backpack is pretty straight forward, so we'll just push on through. The first time you read through the zipper part, it can be a little confusing, so hopefully my pictures can help you visualize it.


You need your two zipper panel pieces cut from the outer fabric and interfaced with that 1.5" strip. You can see mine are double interfaced. I'm using a thin charcoal gray corduroy, so I'm interfacing all of the pieces. And I chose a bright red sport zipper so that it's easy for little eyes and fingers to find.


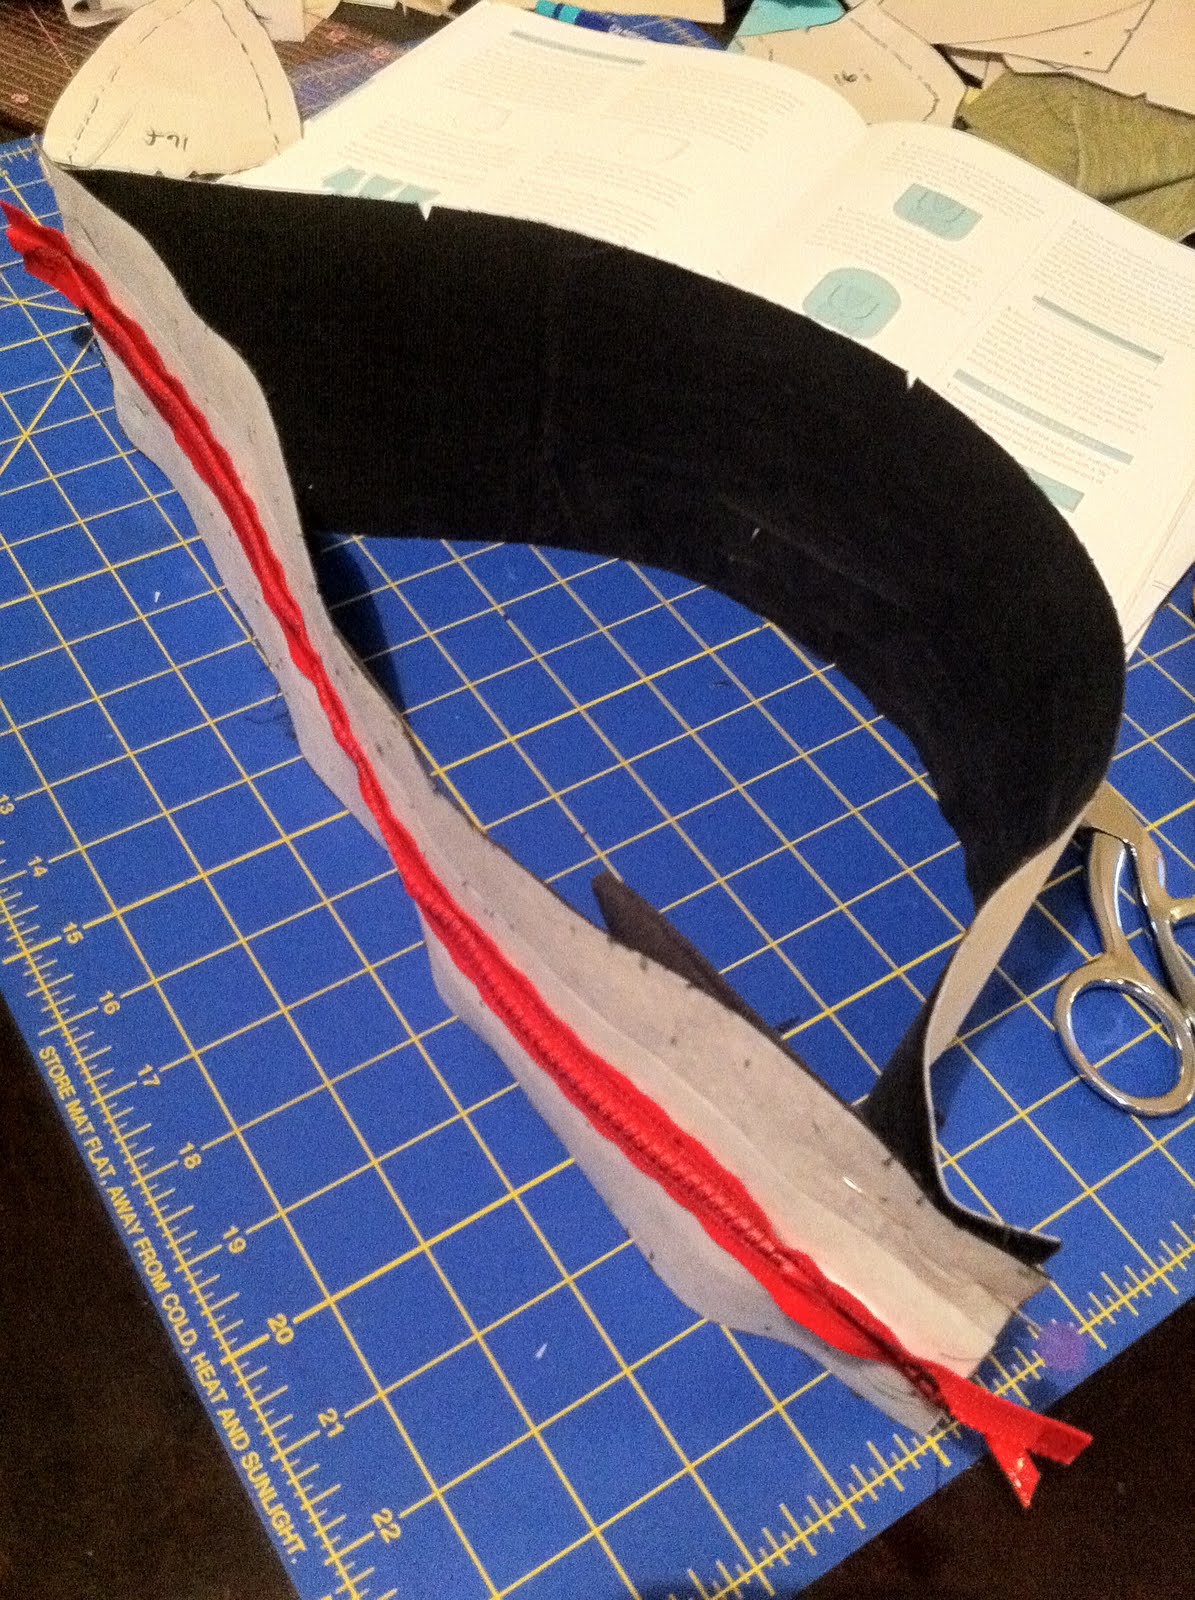
Here's what the wrong side will look like after you stitch together the interfaced long sides and press seams open. This is just a basting stitch that we will be taking out later. So turn your machine up to the longest stitch length and don't backstitch the beginning and end. I also found it helpful to use contrasting white thread here because it was easier to see all the pieces when ripping it out later.


Now you are supposed to mark a line on the right side, 3/8" on either side of that seam. My fabric marker didn't show up on this very well, so I resourcefully grabbed a giant fat stick of sidewalk chalk. A bit cumbersome, but it worked and wiped off easily.


Now flip it back over and pin the zipper on, so that the top of the zipper is against the wrong side. We are just pinning it centered on that first seam, so that we can hand baste. This is not something that has to be pretty at all, you can see how huge and hasty my stitches are. But it would be nearly impossible to try to get the zipper and all the layers through the machine with pins. Don't try to skip this necessary step.            


Now rip out that first machine-basted stitch before you sew down the zipper. This helps things settle into position. 


Has everyone dug their zipper foot out of whatever chaotic drawer or bin it's been hiding in? Good. Put it on. Maybe you've never changed your foot before. That's ok, dig out your manual if you need to and figure it out. It's really not hard at all. As a self-taught sewer, I put this off as long as I possibly could in the beginning. But then I did it and realized it's actually worth doing, and it's easy. Same thing with changing your needle regularly. Anyway, we will have the zipper on the left side of the needle, so clamp down on the left side of the foot, as shown. Then you will just sew down the lines marked earlier on both sides.

Here's an extra tip- When you get a couple of inches away from the zipper as you sew toward it, stop and lower your needle. Then raise your presser foot up as far as you can and move the zipper back past it, then continue sewing. Then you never have to actually sew past the big part of the zipper. This is what I tried to show in the picture on the right, hope that makes sense. If you do this very carefully, you might even be able to go without the zipper foot. But I'd still recommend it.


You can see here that I ended up sewing another line inside of my first ones. This was because when I turned it over, there were places where the seam allowance did not get caught in the first stitch I made down the chalk line. It was no big deal to fix and now it's extra reinforced, but you might want to just sew a little inside of where your marked line is to make sure you catch that seam allowance the first time. Also, I obviously took out those big ugly basting stitches.


Now the only thing left involving the zipper is sewing it to the long outer side panel with the wings. I took a picture just to show that when you line up both short edges of these two pieces, they won't lie flat because the side panel is much longer. When you sew these seams, (you don't need a zipper foot now) be slow and careful so you don't run your needle into the zipper teeth. That would be bad. Just lift up the foot and move over the teeth, then continue. I actually backstitched before and after that long stitch over the zipper as well as at the beginning and end of the seams. 


Turn it right side out and admire your awesomeness! Zipper JUBILATION! Those wings placed there are pretty genius because they will make easy zipper pulls for toddlers. I'm so excited to finish this, it's pretty much going to be the cutest thing I've ever made.

Just waiting on those strap adjustors which I did have to order. (Boooooo Joann's)

So how's it going for you guys? Let me know if you have any questions about my zipper explanation. And please let us know if you conquer the zipper for the first time- It's exciting!




Friday, September 9, 2011

PR, Episode 7: A new favorite villain

The past few weeks have been all about hating Bert. Now it's much more fun to hate Joshua. They should just have an arm wrestling match or something for who will be this season's most hated.

So this was, I believe, the third team challenge of the season. They were in two teams of 5 and each team had to put on a fashion show complete with custom printed fabric, a runway video, music and whatever tone and direction they wanted to take. Literally, they could have done anything.


... and this team chose to go with clocks. They approached their fashion show like they were planning a baby's first birthday party. Pick a theme and everything matches the theme in the most literal sense. I realize it is hard to get 5 people in a group to agree on one idea and all be excited about it, but it is also very hard to believe that none of them could come up with something better. Or that none of them at least said, hey, clocks aren't really an idea, they are just objects. Why don't we make it about time? 

I'm not sure exactly whose idea the clock thing was, but at least it was better than Josh's girly village people idea. Even if it wasn't his original idea, he sure did carry it in the wrong direction. Besides the fact that he absolutely ruined any good vibes the group could have had with his big tantrum in the beginning, he followed that with a slew of really bad ideas and he was obviously the non-leader leader of this group. His video ideas were awful, his print was awful, and his whole outfit was awful. He seemed really proud of that cog jacket (top photo) but I don't see anyone really wanting to wear something that fits like puzzle pieces over your boobs. And the pants are wildly unflattering. 

I say all that, but I'm going to have to agree that Becky was the right choice to go home this week. Josh ruined this group's whole show and collection, but that was because he had three girls on his team that thought it was better to keep their perspectives to themselves rather than add fuel to his fire. Even Bert seemed to do his best to stay out of Josh's way (even though it's still a bad attitude if it's under your breath.) My point is, Becky may have interesting things to put out there as a designer, but she's spent most of this competition keeping those things to herself in an effort to please everyone and keep the peace. Her outfit (lower left) was boring. If your team's going down in flames, don't try to please the jerk doing it, just make the one kick-ass outfit that stands out from the rest. Laura and Kimberly also rolled over to Josh, but they at least made decent and interesting outfits with their own perspectives. Although, I kind of hate Kimberly's (middle right), but it's not sad and boring. 

And one more thing about Josh. The show is really good this season about showcasing the villain of the moment's sad story as if it's an excuse for ass-clown behavior. But it isn't. Ever. I'm not saying I don't feel for Josh. I'm sure he has deep and genuine pain about the death of his mother. I won't pretend to know what that's like, but I think it's a good excuse to have bad, sad, and depressed days. It's a good excuse to get a little emotional. But it's never a good excuse to treat other people so poorly. I hope I don't sound insensitive to someone who truly has reasons to be upset. I'm just saying he should probably figure out better ways to deal with it or life will be very difficult for him. Either way, the producers are playing those sad stories like fiddles, aren't they?


This was the winning team. Obviously. I really loved that little bit of editing where they showed the team laughing and smiling together in slow-motion while the other team looked on, so forlorn. That was kind of hilarious. The getting along really helped them and it shows up in their collection. I can't think of much I don't like about these looks. The one thing that I thought was pretty cliche was their footage of people moving in the city. It's been done a gazillion times and it seemed a little obvious for their chaos idea. I think it might have been much cooler if they had carried the ink blot idea into the video and made it moving and kaleidoscpopic (not a word.)

I'm not sure I agree that Anya should have won though. I love her dress (bottom right) and her style obviously shows through all of those prints. But Anthony probably should have gotten more credit for the direction and idea of the collection. And I thought his look was pretty adorable too (middle right.) But Viktor's gown? COME ON. Tell me it wasn't gorgeous and I will fight you. Making a rorschach test look that chic is impressive and downright cool.


It finally became clear to me this week that Anya, Anthony, and Viktor should go to fashion week. It was a little murky until this episode, but I'm calling it now, here in stone, on the interwebs. Do you agree? Who do you think are top three?


Wednesday, September 7, 2011

A baby dress

But not for my poor neglected daughter. Remember that time I made her a dress a week before she was born? I'm really glad I had that pregnant motivation because I haven't sewn her a thing since. She just grows out of them too fast! And I'm not saying that in the drippy emotional mother sense, I'm just sayin, she literally grows out of them quicker than I can make them. So, Miss Elsie, you are punished with the wearing of generic onesies for all that healthy growing you are doing. Why do children's clothing brands feel the need to put little sayings on every single item of clothing? It can't just have cute purple flowers on it, it also has to say "daddy's favorite" or "silly-dilly little dumplin puddin-pop face of sugary-sweet bunny-bunny hop land."


Anyway, I made this dress a few weeks ago for one of my bestest friends who is having her first baby this month. It's Rae's Itty Bitty baby dress which is really fun to make. And the fabric I found at Joann (gasp!) on clearance. Definitely the cutest stuff I've found there in a while. Or maybe I just don't go there anymore. I'm a total quilt shop snob now, I won't deny that.  


Speaking of fabric snobbery, I'm doing an echino swap. So.... that's pretty awesome. I will end up with 28 amazing Echino prints in 10" squares. I'm thinking I won't even cut into them, just make a square patchwork quilt. We'll see, but I'm pretty excited to get my hands on them. (If you don't know Echino, here's a lot of the prints.)


FTLOS- a start

And here's a peek at my current quilting obsession project. I really need to learn how to survive on four hours of sleep. Time to get back at it, this one has a looming deadline. 


Monday, September 5, 2011

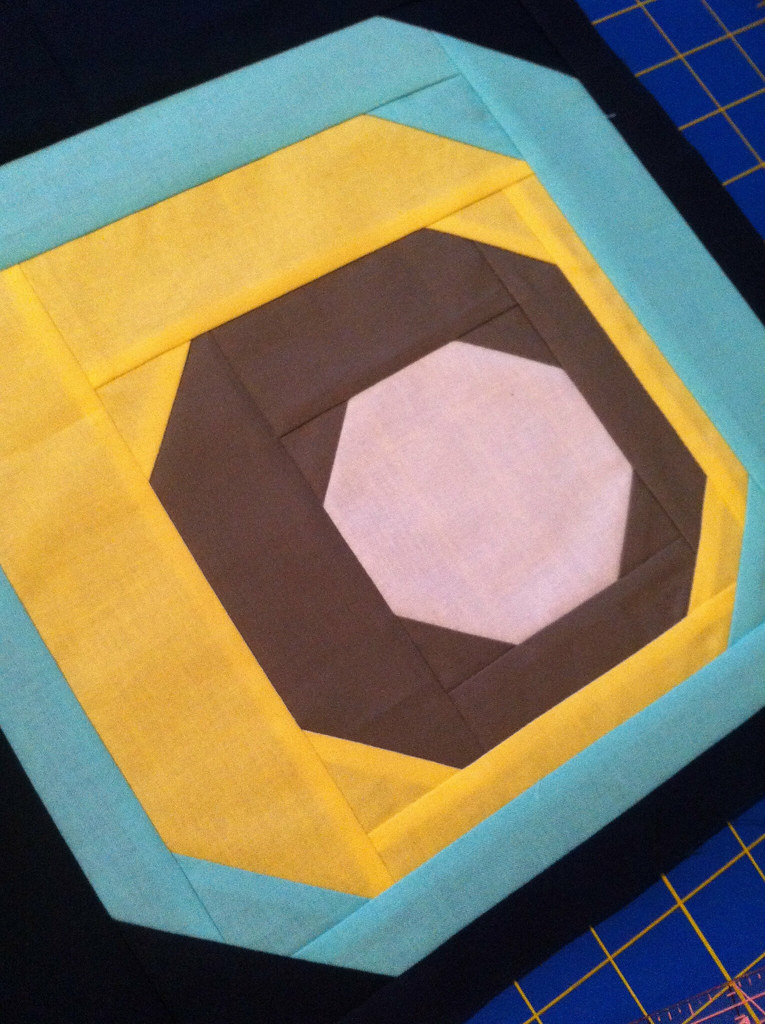
A Mini-Quilt for Your Monday

I had a small finish over the weekend! But any size quilt finish always feels good...


I made this mini for a swap in the Cincinnati Modern Quilt Guild, which I seem to have unwittingly joined :) I hope my partner doesn't read the blog, but if she sees it, oh well. She didn't give me any parameters for what she likes, so I just cut into some of my new fabric and had fun with it. I hope she likes it because I really do.


Here is the back. (I totally forgot to add anything in the binding to make it a wall-hanging. Whoops.) This being my second ever finished quilt, it also has a lot of firsts. First time using mostly prints, first flying geese, and first time trying the dreaded free-motion quilting.


Which really wasn't that bad. A little practice on some scrap batting and a little vodka-infused watermelon seemed to help. I think. I like how it came out overall, but here you can see how crazy long some of my stitches are. Stitch length definitely needs some work. It's honestly not my favorite style of quilting. I still much prefer straight line, but I want to become good at this too.


My favorite part has got to be that binding. I'm so glad I have more of it because it will definitely become binding again sometime. It's Ann Kelle's Remix zi-zag. I also really loved making those geese! I must make more soon. 


And did you notice that white isn't really white? It's Seed Catalogue from Annie's Farm Stand. I got a fat quarter bundle which included the white on white, but I had no idea how I would use that color. When I saw it in person, it turned out to be my favorite of the bundle. It's really gorgeous. 

I'm joining in Faith's mini-quilt Mondays. Faith visited our shop when she was in town once and she was the nicest ever. Her kids were also adorable (and very well behaved), even when her 4yo daughter announced loudly before they left that she had to poop. Faith just rolled her eyes and laughed. Everybody poops sweetheart, even quilters. 


Fresh Lemons Quilts

{Sew} Modern Monday at Canoe Ridge Creations


Celebrate Color


Saturday, September 3, 2011

LTTSA: Backpack Part 1- Supplies


Woohoo! I'm so excited to start another month of the Little Things to Sew-Along! The first one went scrumptrilescently because you guys are so amazingly creative. We had 17 people link up their completed bucket hats, and I know I saw at least a couple more on Flickr that said they were sewing along. I don't know about you, but I definitely got some good practice on sewing curved seams and making pretty topstitching :)

Alright, let's get moving on our backpacks, because if your preschoolers haven't started school yet, they will be soon. And even if we miss the start of school, that's ok too. We are all about stress-free sewing along here.

We need a yard of our main fabric. If you are making a regular backpack, you could really pick any home-dec weight fabric or something else canvas-y. I think some echino or other thick Japanese import would be adoooooorable (if pricy) but might still need a little added interfacing or backing.

I haven't purchased my fabric yet, but I am making the penguin version, so I'm looking for something that is solid or at least reads as fairly solid. The version in the book looks to be cotton twill, which I think looks really nice. But I'll probably buy either denim or corduroy from the shop I work in. The corduroy is very fine wale and thin, so I'll have to interface that as well.

When you are picking out your fabric and wondering if it's the right choice, I would just trust your instincts. If it feels sturdy enough to be a backpack, it probably is. At the same time, you don't want to get something extremely heavy, (like maybe denim from thick jeans) because you will have to sew through a few layers of it at times and don't want to have too much trouble.


 More ideas on that here, from someone who has made it. Go on, read it... Thanks to Erin for paving the way for us :)


As far as other supplies, any quilting weight cotton is good for lining and the outside embellishments. You also need 1/2 yard of lightweight fusible interfacing.

The zipper- you need one of those bigger-molded-toothed kind, 18", which you can find at Joann or wherever. Not invisible and not one of the little-teethed kind you would put into a zippered pouch or something-


Strap adjustors- this might be a little more tricky to find. I haven't actually looked at my local Joann yet, but they are on the website. But they aren't called strap adjustors in the 1-1/2" size, they are called slides. (I tried looking on the site listed on the resource page in the book. Couldn't find them there.) I also think you might try like a sporting goods supply place if sewing supply stores don't have it. But it might just be easier to order online. And it doesn't matter if they are plastic or metal, just as long as they are made to fit 1-1/2" straps.


Penguin Backpack Lining

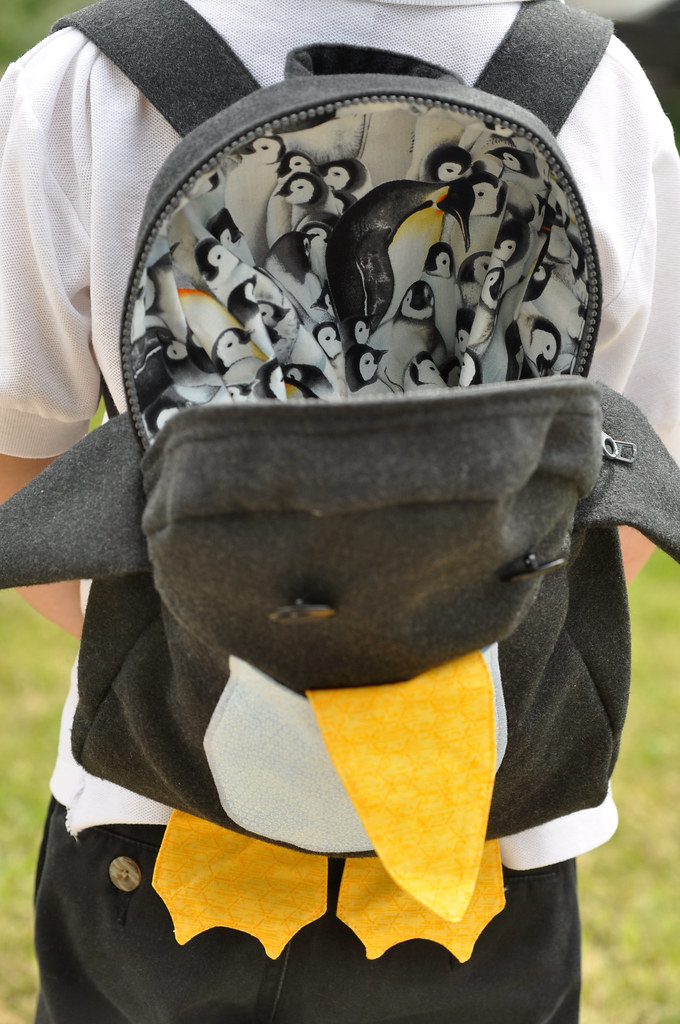
I'll leave you with another gem I found on flickr. Penguin fabric lining! Love it. 


Alright folks, we'll get started as soon as I can get my crap together. You can cut everything out and put together the front and back of the outside, but if you are scared of apprehensive about the zipper, I'll walk us through that part of the instructions with pictures. Don't worry! You'll do splendidly. 

So what are your thoughts on fabric choice for the outside of the backpack? Anyone have a good resource for strap adjustors? 


***Also, some of you have said you would rather make the messenger bag. No problem, you will still be eligible for the giveaway if you link up your project. I'd love to see them!


Wednesday, August 31, 2011

Fall Sewing- Big Plans I Say!


01

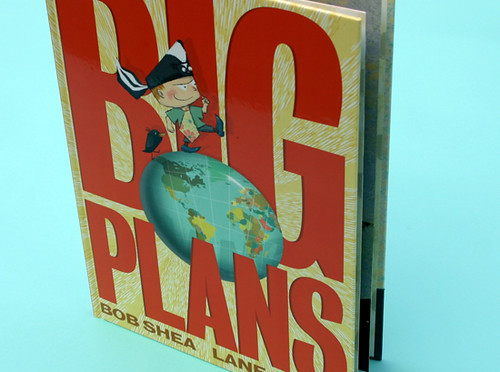
Have you guys ever read this book?

03

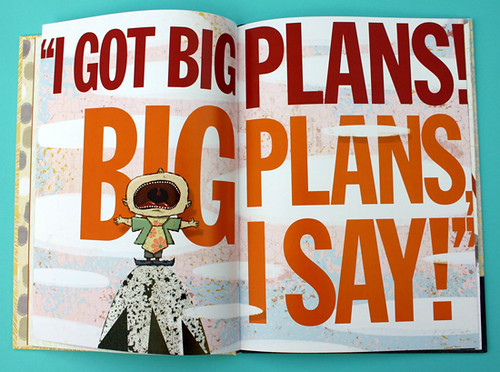
It's a BIG favorite in our house- among the young and old alike. 

That's how I feel about all my ambitious plans for what I am going to sew this fall. AND I WILL SHOUT THEM AT YOU FROM ON TOP OF A MOUNTAIN! Or just from right here.


First of all, I want to make a lot of my kids' fall wardrobe. Namely, both their coats, some Hendrix pants and some Elsie jumpers. Here's just a little of my inspiration:


1. Puppet Show Dress Modified, 2. red and teal jumper , 3. Big Uptown Girl Jacket, 4. Toggles, 5. Stripey top 1, 6. IMG_3740.jpg, 7. sailboat pants, 8. Kimono PJ top, 9. backpack

I want a lot of stripes, plaid, buttons, and fun trims. A lot of Oliver & S patterns. A lot of adorable details. Oh, and definitely a lot of the Robert K fine-whale corduroy we just got into the shop.

And of course, we are making the penguin backpack this month in the sew-along. How cute is that thing?


I was going to try to tackle sewing something for myself to wear this fall, like something actually tailored and requiring a pattern... but if I'm honest with myself, that sounds even more painful than shopping for something to wear. I'll stick with sewing for the kids while they are still young and wear whatever I want them too.


Moving on to my quilt inspiration. I pretty much want to make every quilt I see. This is a bit of a pocket book/ time/ obsession problem...


1. Linen Love with Lotta Jansdotter fabric, 2. Fresh Modern Bee - July block for Mandy, 3. Cross Your Fingers Quilt, 4. miscellany quilt, 5. Lightning zigzag tutorial is up, 6. finished Swoon quilt top, 7. For the Love of Solids Mini Quilt, 8. Grey and Yellow Quilt, 9. the blocks, 10. Big Zig Zag Quilt - Finished Frontwtmk, 11. Bicycles, Birds & Lime Sherbet 2011, 12. DQS9 from lizzy house, 13. Improv II for Rangsiwan, 14. Curved improv piecing cushion, 15. Kona challenge quilt, 16. baby Ingrid in progress


Do you see my problem here? I obviously love all these improv and geometrical looking modern designs. But I'm also a sucker for those traditional blocks in fabrics I love. Like that Swoon pattern that's so trendy now? Irresistible. And those summer sampler blocks are crawling under my skin slowly too. I've actually started a couple for work, but I might end up tackling the whole thing for a couch throw or something.


Speaking of the living room, I have also started hating everything in there for no reason at all and need to change everything that's not furniture.

I'm REALLY inspired by these curtains...


which were inspired by these curtains.

Why have I always had it in my mind that curtain panels had to actually be solid panels? I don't know,  piece them! Then of course, I will need all new pillow covers and something pretty on the walls. It never ends. 


So just to recap, the major staples of 2 kids' fall wardrobes, somewhere between 3 and 33 quilts, and a whole new look for the living room. Oh, and a penguin backpack and some Christmas gifts, whatever those will be. Totally reasonable. 


(Are you guys checking this out? Could I be any more of a Rachel groupie?)
Celebrate Color