Canvas People is still having a great promotion- you can get a photo printed on stretched canvas for FREE! Actually, the free one is only 8x10, but all the other sizes are about $50 off as well. I did the 16x20 size for a Christmas gift and it looks great. I figured the promotion would long be over by now, but to my surprise, it is not. Maybe it's not really a limited promotion at all, but either way, they got me. I'm a sucker. I mean, have you ever price-checked those canvases before? Pricey.
Now I'm going to get another one of HG. Probably one of the pictures from our family shoot with Fyrefly Photography.
(Blogging on my lunch break. Better get off before I get dooced!)

Monday, February 1, 2010
Saturday, January 30, 2010
Baby Gift: Fabric Blocks
I made these yesterday for friends whose adorable baby boy was born last month.
 Please don't ask me his name, that's private...


They are easy to put together, just a lot of squares to cut. It's basically this, plus the letter appliques.

And I put jingle bells inside.

"Hey, when are you going to make me something?"
Thursday, January 28, 2010
OBSESSED WITH: Faux Bois

1. Wristlet from JLStephens Couture
2. Pillow on Apartment Therapy
3. Bookshelf makeover on Imacookoo
4. Memo board from Ekoh Design
5. Gift Box on CraftStylish
Want more? There is an entire blog devoted to it!
Tuesday, January 26, 2010
Sweater Sleeve Accent Pillow How-To
I was working on sprucing up the guest room/ craft room last night, (remember this mess?) and I made a few pillows. I really wanted to do one of those pretty sweater pillows, like this one, but both of the old sweaters I wanted to use already had the bodies chopped off and made into other things. So I made do with the sleeves, and I love the way it turned out!

It's very quick and easy, here's what I did:
You will need 2 contrasting sweaters- at least the sleeves, stuffing (I ripped open an old pillow for mine), and a button or some other type of embellishment.


Unroll both the cuffs and stuff one side into the other. Make sure you shove it deep enough so that when the cuff of the outer sleeve is rolled back up, it looks like it's right in the center and everything is even.

Now sew a seam thru it all right behind the fold of the outside cuff. You will be sewing thru four layers of thick sweater, so if your machine is finicky, you might want to hand sew it. Turn your cuff back over to hide the seam.


Now is a good time to cut off the extra bit of sleeves hanging out.
My camera battery died here, but you know the rest. Turn thru the opening you left, stuff, and hand sew shut. I like to use a ladder stitch, which I learned how to do here.

Finally, add a cool button or other pretty embellishment to the middle of your cuff. I used this great button with an anchor on it that came off of an old navy pea coat (not Old Navy, but the actual Navy). I think it's perfect for the black and white pillow.
Best part- $0

It's very quick and easy, here's what I did:
You will need 2 contrasting sweaters- at least the sleeves, stuffing (I ripped open an old pillow for mine), and a button or some other type of embellishment.

First I took my black sweater (already just a top half) and cut the sleeves away from the collar. I tried to cut as close as I could to the collar. Then I opened them up by cutting open the seams on the bottoms- you know, the one that goes from the armpit down. Then I just stacked the two pieces I had left and cut the largest rectangle I could get out of the them- looks like it ended up being about 18" by 9"

Next I cut the sleeves from my white sweater. It is best to use sleeves that already have cuffs for this, but you could also just cuff them yourself.


Now make a sandwich with your two outside pieces right sides together and the other sleeve piece in the middle. Pin and sew around the outside with a 1/4" seam allowance. Be sure to leave a few inches open on one of the long sides, and backstitch on either side of it.

My camera battery died here, but you know the rest. Turn thru the opening you left, stuff, and hand sew shut. I like to use a ladder stitch, which I learned how to do here.

Sunday, January 24, 2010
Chocolate Covered Clementines
I'm not one to think of new concoctions on the fly in the kitchen, but today...


...mmmmm. Brilliant.
Saturday, January 23, 2010
Duvet to Curtain How-to
Apparently, I haven't posted for almost 2 weeks- whoops. What a slacker.
I'm going to attempt to do a semi-instructional here, so hopefully you can understand what is happening in these bad pictures.
We've lived in our apartment for over a year now. For most of that year, we used a big red duvet cover from Ikea nailed into the wall to keep the light out from the window behind our bed. Pretty classy.
Then I finally thought, "Hey, I could probably make that duvet cover into 2 panels and we could actually have curtains on both our bedroom windows!"
I realize this would be very easy for any sewer to figure out, but here's how I did it:


When cutting down the crease, I would NOT recommend spreading it out over your lap like I did. Overcome your laziness to clear a spot on the floor large enough to lay it flat and then cut. As you can see, the other way is just plain awkward.


I'm going to attempt to do a semi-instructional here, so hopefully you can understand what is happening in these bad pictures.
We've lived in our apartment for over a year now. For most of that year, we used a big red duvet cover from Ikea nailed into the wall to keep the light out from the window behind our bed. Pretty classy.
Then I finally thought, "Hey, I could probably make that duvet cover into 2 panels and we could actually have curtains on both our bedroom windows!"
I realize this would be very easy for any sewer to figure out, but here's how I did it:

This cover is queen sized I think. It would probably work better with a king, but for our windows, this was just barely wide enough. Since I'm so exacting, I measured by folding it in half and holding it up to the window just to make sure. Then I ironed a crease down it length-wise so I would know where to cut.

When cutting down the crease, I would NOT recommend spreading it out over your lap like I did. Overcome your laziness to clear a spot on the floor large enough to lay it flat and then cut. As you can see, the other way is just plain awkward.

Now turn the panels inside out.

Line up the 2 layers of the cover on the side you just cut and pin down the length. You might be tempted to skip this, but since you are sewing down such a long length, the layers could get misaligned easily. Or maybe I'm just an amateur.

Sew from the bottom of the panel to the top. Leave about an inch and a half open at the top and backstitch to secure. (You might leave more or less space then this, depending on what you are hanging the curtain on. Or if you use those curtain tab things, you don't need to leave any space.)

Turn the whole thing right side out through the opening at the bottom where the duvet went on.

Now you could ladder stitch that bottom opening closed or something, but I just ironed it under. No one will examine the bottom of the curtains anyhoo.

Back at the small opening you left at the top, stitch the little seam allowance under so it doesn't peek out on the curtain rod.

On the other side of the top, make another little opening with your seam ripper and stitch the top of that one under as well. Repeat on the other panel and you are done!

Red in the bedroom is saucy, no?

I almost made our bed for this picture, but who wants to live a lie?
I think they will look better with some sort of tie. But putting up curtains is always so satisfying to me. It's the easiest way to make a room look more complete.
Monday, January 11, 2010
Free Paper Playthings
I'm finding papercraft everywhere these days, particularly toys.
HG is still a little young to appreciate such delicate fun- he would enjoy eating these toys though. Luckily, many of these are just as fun for grown-ups. Just print and fold.
I found the Toymaker a while back. She has beautiful 3d animals, story characters, boxes, and lots of holiday fun, like this little Valentine delivery elephant.

But my ultimate favorite is cubeecraft which has tons of movie, tv, and other pop culture characters, cubified. You can make this Fezzik from the Princess Bride- I mean, come on!

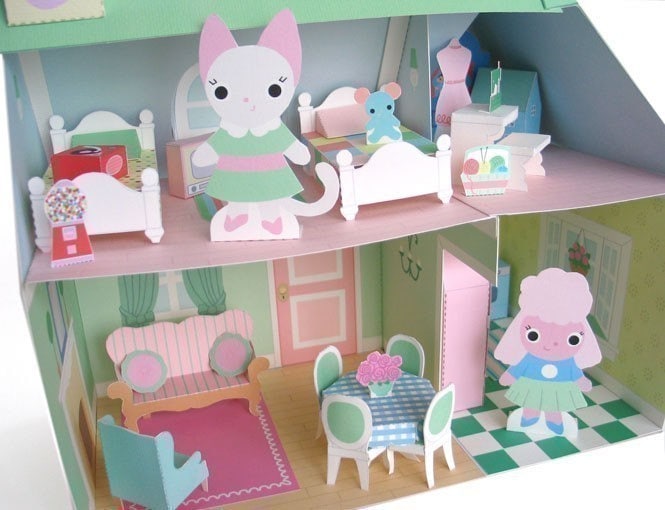
And of course, another little girly-girl treat that makes me hope HG gets a little sis someday. Fantastic Toys Etsy shop has adorable pdf characters, nesting dolls, and even entire multi-room dollhouses. They aren't free, but very reasonable. But you can get some great free stuff from their blog, here.
Find beautiful print-out pinwheels here.
This site has many more woodland and mythical creatures in the cube style.
Really zany ren and stimpy-ish characters here,
and musical figures and more at toy a day. (My favorite there is Ziggy Stardust!)
Have Fun!
Subscribe to:
Posts (Atom)