Showing posts with label LTTSA. Show all posts

Monday, April 9, 2012

The Final Winner Is...

(Ha, that sounds a bit ominous doesn't it? Cue "Final Countdown" opening synth in your head...)


Entry #6, Jenny! I'm so glad Jenny won, she is another sew-alonger who has been so faithful and supportive. I'll be emailing you soon about your copy of Growing Up Sew Liberated. I wish I could buy a book for all of you who played with me, but I didn't win the Mega Millions. (Obviously, that would have been the first purchase on my list.)


Thanks so much for sewing-along and for helping me and one another thru these fun projects. I learned a lot, but I think my favorite part was seeing how encouraging everyone was to others in our little group. 

So thank you thank you thank you!!!


(I could remind you to vote for me this weekend, but I'll try and resist. That would just be annoying.)


Saturday, March 31, 2012

LTTSA: The Final Link-Up!

This is a bit sad isn't it? But not too bad, because I know we've all made some new friends thru this little sew-along and we'll keep the fun going in other ways. And I promise that I will soon work on updating the Little Things to Sew Along page on my blog so that it links to all our old posts. That way it's here for people's reference. For instance, summer hat time is coming again and you might want to make bucket hats with no hand stitching. Or you might want to make a backpack for your preschooler in the fall and need guidance on the zipper.

Anyway, onto the vests and other pretty projects!


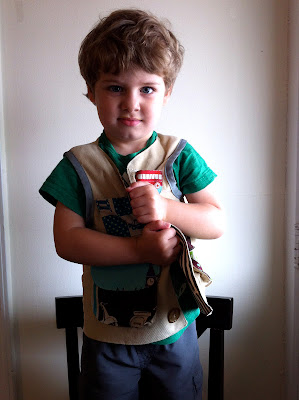
I didn't even need to tell Hendrix that this was the way to model a vest. He just said, "Hey, what you looking for? You've seen my watches? I've got sunglasses too... very good price." What a worldly two year old.


You may notice that my buttons are not at all spaced evenly. Blurg. I made the bottom button hole first, then I went to do the middle one and my buttonhole foot would not move over the thick pocket layers. I tried and failed many times. So there was nothing else to do but move the top two buttons up some so they weren't aligned with the pockets. Hopefully you don't make the same mistake if you make the vest. I also kind of regret using crunchy pre-made binding on the armholes. I should have made something a bit more fun. No biggie though.


Can't wait to see your final projects for the sew-along!

Remember, link up by next Saturday and you could win your own copy of Growing Up Sew Liberated.

(P.S. I'm soooooo sorry that this link party won't have thumbnail pictures. My inlinkz account expired and I didn't want to renew since this is the last one. I know, cheap. Please make sure you visit other's links even though you can't see a pretty preview of it! It's actually kind of fun and mysterious this way... No? Ok, you're right. Sorry.)


Tuesday, March 20, 2012

LTTSA: Making Bellows Pockets


Let me just say first off- If you are making the vest this month and still hee-hawing about whether to do the bellows or not, just do it! Yes, this took extra time, but to me it's totally what makes this vest explorer-ish. I love the way mine came out and they really aren't hard to do. I'm sure Hendrix will like wearing it when I convince him it's just like Diego's vest. "SAY BELLOWS! SAY IT LOUDER! EVERYBODY SCREAM!" Most stressful kid's show ever. 


So first, you press one long edge of the bellows to the wrong side by a 1/2 inch, then pin the other raw edge to the pocket, right sides together. Clip into the bellows piece on the curved parts and stretch it to fit, just like we did on the bucket hats so long ago.


Here's what the front of your pocket will look like after you sew that seam and press. I found it easiest to press the seam allowance towards the bellows.


Now turn the pocket back the the wrong side and hem the top as instructed. You'll notice the the first fold you made is still there, but the rest of the bellows piece is not folded into the hem. The diagrams in the book are actually really clear for all these steps, but real fabric pictures help a little too.


 Then you are going to topstitch the seam around the pocket and bellows. It's easiest to do it with the bellows on the top. Take it nice and slow around the curves so you can get the extra fabric out of the way without getting any puckers.

I didn't take a picture of this step, but then you are just going to pin and topstitch the other long side of the bellows (still folded under) to the vest where you transferred the marks from the pattern.


Lastly, add bar tacks (a tight zig zig stitch) on both sides of the hem so that the top lays flat and doesn't hang open. I haven't done it yet in this picture, just pointing out what the sides will look like. 


My front pockets are all bellowed up and just need flaps. I'm so happy to have learned a new type of pocket because I LOVE pockets. Who doesn't?


Link party for your explorer vests and other projects from Little Things will begin on the last day of the month and you will have a week from then to add yours. Remember, you could win the wonderful book, Growing Up Sew Liberated.


Also, I wanted to let you guys know I was interviewed this week over on Krista's awesome blog, Thar She Sews. It's all about the stuff you care about- fabric and sewing. Check it out right here.


Monday, March 12, 2012

LTTSA: Explorer Vest Part 1 and Important NEWS!


First off, you sew-alongers are waiting very patiently for a winner...

It's #8 Grandma G! I'm so happy she won because she has participated almost every month, if not all of them! I'll be emailing you about which fantastic Figgy's Pattern you would like.


Moving on to March's sew-along, I've actually got my fabrics cut out in the first half of the month- I'm not a loser! I'm using khaki corduroy leftover from these pants and Echino prints for the pockets. I think those really fit the whole explorer thing. I'm using that brown stripe for lining, just haven't cut those pieces yet. (Ok, so maybe I'm a little loser-y.) I plan on doing the bellow pockets because I want to learn how, so I'll throw up some pictures of the process for you next week.


Now, originally I had planned on also making the cape this month and then people could do either. They still can, but I will only be making the vest. Also, this will be the last month of the sew along :(

But it's not because I don't love sewing along with you guys! I actually have a really good excuse. I'm going to be competing in this season of Project Run & Play! Yes, it came as a BIG shock to me too :) I'll have to post more on my feelings about this whole business another time soon, but I wanted to make sure everyone knew this would be the last month of the sew along because this contest is going to take A LOT of sewing and blogging energy, so there is no way I'll be able to lead a little quilt-along too (even if I don't last very long!)  So if you have been putting off joining, do it now!!

This month's prize will be a gift just from me to show my gratitude for you guys being so enthusiastic about this with me. I'm getting the random winner a brand new copy of Growing Up Sew Liberated! It's a fantastic book and I think anyone who loves Little Things To Sew will really enjoy this one.


So are you guys making the vest this month? Who are you making is for and what are you using?


Wednesday, February 29, 2012

LTTSA: Play Town Link Up!


This was definitely the most fun I've had with a sew along project so far! It really surprised me how much I liked fussing over some of the details, which was well worth it. 


I'm really happy that I had to finish this today- Elsie's birthday present is ready almost 2 months early. So unlike me. I made a pretty elaborate gift for Hendrix's first, so I really wanted to do something special for hers too. I still plan on making some type of play mat to go with it, but I don't think that will be quite as much work.


I love the round window on this one. I used a blanket stitch on some windows, zig zag on others, and a few rounds of wonky straight stitches on others. (Both wonky and straight? Yes.) The brownstones have a very convenient scrap of text fabric for embellishment, as well as some other street scenes on the backs I didn't take a picture of. The wood grain is a Joel Dewberry Aviary home dec fabric and the other brownstone is Essex linen in black. 


The houses are Central Park by Kate Spain (the yellow), some seersucker from Sewn, and Alexander Henry Heath. Yes, this bird and car a bit off in proportions :)


So I should have explained earlier about the foam, but I'll share my pointers for anyone who is still working on their project. At Joann Fabrics, they sell upholstery foam in different thicknesses in sheets. In my local Joann, they are in the back by the batting and pillow forms. You need a 4" thick piece, then you can take it to the cutting counter and get them to cut it down to the size you need. The piece I got, shown above, is 1/3 of a yard, which I paid about $13 for with my 40% off coupon. As you can see, I had a lot of it left after cutting out my five buildings, so I probably could have got away with 1/4 yard. I just used one of our steak knives and it wasn't hard to cut. I traced the templates on both sides of the foam so I could always make sure I was cutting straight thru it. In my opinion, it was well worth splurging on the foam over using stuffing. The shape and feel of the houses are great with it. Plus, every other thing I used, I already had on hand, so $13 is pretty good for a birthday present right?

I completed hand stitching the bottoms this morning. You know this isn't my favorite part of any project, but the basting stitches she has you do on the bottom of all the walls really helped. I would have been a mess without those. And I think I'm finally getting the hang of blind stitching after having my mom tutor me about a dozen times. 


Time to share your projects- Remember this month's winner gets a pattern and clothing labels from Figgy's! You have until one week from now, and as always, you can link up a blog post or flickr photo of any project from Little Things To Sew. 


Saturday, February 25, 2012

LTTSA Play Town: All in the Details


So now that I've started on this project, I think I might be having the most fun yet. There are so many ways to add great details with trims, appliqués and fun stitching. And I love the fact that I've used only scraps. I'm going to get my foam this weekend, with a 50% off Joann's coupon in hand. You could opt to use Polyfil if you have some on hand, but the buildings would not stand up and keep a square shape as well. Have you seen Liv's little bike shop? Adorable.

What ideas have you had for shops and buildings? Any special trims you are putting to use? I can't wait to see everyone's creativity!

Don't forget, we will link up starting Wednesday, but you will have a full week from then to add your play towns or any other project from the book Little Things to Sew. (If you are new around here and want to know what I'm talking about, check out the sew-along tab at the top of my page.) You could win an awesome pattern from Figgy's!


Thursday, February 16, 2012

LLTSA: Play Town Plans and Prizes


Confession: I was just not pumped about this month's sew-along project. I mean, I love it, it's adorable. I just wasn't feeling it. Didn't want to make it.


Two things are changing my mind and lighting a fire a under my sewing pants. (Do I have sewing pants? I should.)

Firstly, I got a plan for the how and the why. I finally realized this week that this needs to be part of Elsie's birthday present. Yes, I said birthday. Sorry I made you spit your coffee all over the computer, but it's true- Elsie's turning one in a couple months. So I'm pulling out the girliest of my scraps for a cutesy little town. And I'm going to make a play mat to go with it, kind of like this one I made a long time ago. Except, instead of being a volcanic habitat kind of thing, it will be a beautiful day in the neighborhood kind of thing.

Now I have a purpose. I can move forward!

Secondly, I'm REALLY excited about the prize we've procured this month. I know I always say that, and it's always true because I would never wanna give you guys a prize I wouldn't be over the moon to get. But this month... I get a little a flutter in the sewing part of my heart.

Shelly of Figgy's Patterns is giving away the pattern of your choice!! Because some of you won't click over immediately, I'll just show you the indie chic her brand new patterns are serving up-

I die:


This makes me think something that no mother of a precious-want-her-to-stay-like-this-forever 9 mo baby girl should ever think. That I cannot wait until she is 18 months so she can rock this toddler fashionista business. Those are the thoughts of a slightly crazy person.

Plus, the winner will get a pack of these super cute woven labels you can put in all your handmade goods. Love that.


So, I do apologize for my lackluster leadership this month, but I'm snapping out if it and I hope this makes up for it. Are you guys making a couple playhouses? Are you recreating favorite places in your neighborhood or maybe imagining a whole new kind of candy town or gnome village? Or are you giving something else from the book a try?


Monday, January 30, 2012

LTTSA: Bear Carrier Link Up


As soon as I finished this girly little carrier, I realized how sexist I am. For some reason I just assumed this one wouldn't be for Hendrix so I stuck pink flowery straps on it. But then I finished it and realized he would probably love toting around his "Doggie" in it. He's had this brown stuffed dog since he was born and he carries it around everywhere. So many times, I'll see him doing something that would be so much easier to do if he just put the damn thing down, but he refuses. It's always tucked under his arm. But for some reason I am living in the 50's and only pictured a toy like this being enjoyed by a girl. I'm pretty sure Nick toted both our babies around in carriers just as much as I did, if not more. Just call me a chauvinist.


You may notice that said Doggie is conspicuously absent from these pictures, and replaced by this lackluster bear that was apparently attacked by rainbows. This post is coming to you from our vacation to sunny Florida. (Yay!) Being the genius parents that we are, we realized about 3 hours into the 17 hour car ride down here that we had somehow left Doggie at home.

I had a bit of an inner freak out. This was obviously going to be a very long trip to make with two little kids and we really didn't need any circumstances adding to the potential hellishness. We were counting on the kids sleeping most of the trip, since we were driving thru the night. Hendrix always hugs his Doggie when he sleeps, he needs his Doggie to sleep.

I began searching on my phone to see if we would be driving by any Ikeas, since that's where thousands of these identical doggies reside in big white bins. Sure, a new doggie would not have snot-dreadlocked fur and a completely limp neck, so it probably wouldn't have satisfied anyway. And it turns out, the Atlanta Ikea is not open at 3 AM. Weird.

Anyway, it was not an issue on the car ride at all. He slept fine and never mentioned it once. Not one whimper of the doggie. The next day we had settled at Grammy's house and I was reading him a book before his nap. He abruptly interrupted with, "Hey! Where's my Doggie?" I replied softly that we had left him at home and then winced, waiting for the storm of grieving that was sure to follow. He lackadaisically replied, "Oh." I finished the book. He went to sleep. We have been here 4 days and he has not mentioned it since.

What is the moral of this story? I'm not really sure. Probably that I want him to hang on to this vestige of childhood more than he does. I'm mostly the kind of mom that wants to help my kids grow up and learn independence. I'm not at all sentimental about these kinds of things, like moving the newborn out of our room, or even the end of nursing. That part of me knows that this is the perfect opportunity to go home, hide Doggie before he remembers their lifelong love affair, and break the habit for good.

But I'm pretty sure I'd much rather see Doggie tucked under my boy's arm for a little bit longer... Or in a girly pink carrier.


Alright patient friends, time to link up your projects from Little Things to Sew. They may or may not have a sappy story attached, definitely not required. Remember, you have until one week from now, and everyone who made something will be entered to win a free digital pattern from Oliver & S. Can't wait to see your stuff!


P.S. If you are reading this on Tuesday, I'm at Disney World! Yahoo!!!


Monday, January 23, 2012

LTTSA: Just a Little Buttonholin'

January is flying by! Have you started on your projects yet? If you are doing the bear carrier like me, at least it's a fairly quick sew. And if you are like me, you tend to let finishing touches like buttons and buttonholes linger on these little projects far longer than they need to. Why? I don't know.

Since you are all such good seamsters, you probably know your way around a buttonhole. But maybe there are a few of you out there who have been avoiding them. I thought I'd show you how very easy they are, just so you know :)


I did not pre-mark my pieces as called for. I'm a bit of a hoodlum that way. But it's very ok in this case because it's the nature of the project that the button and hole don't have to be in exactly the right places, not like a shirt placket or something. Anyway, I've never really found a marking tool I was crazy about until I bought this chalk retractable pencil. Totally worth it. So the first step is to mark your line at the appropriate angle, about as long as your button.


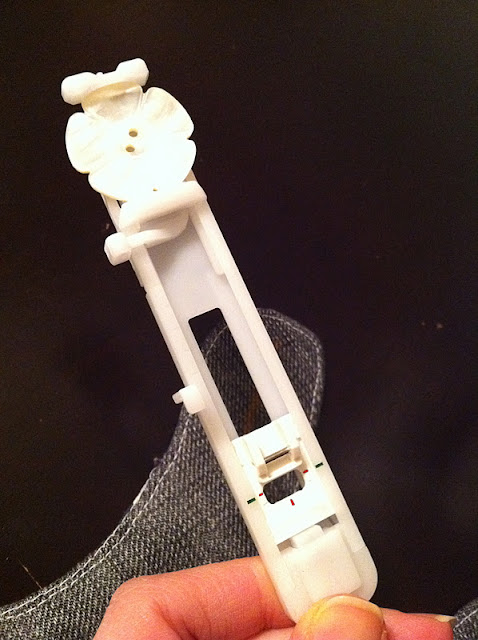
Now find your buttonhole foot. This shouldn't be too hard- it's the one that's REALLY long. There is an adjustable bit in the back where you clamp your button in place. This will tell your machine exactly how long to make the hole to fit that button. Magic! Or simple mechanics, whichever.


So place your fabric under with the front of the line you drew under the needle. There should be little red lines on the foot or something similar so you can make sure things are centered. Then you lower the buttonhole lever, as I'm doing on the left there, and make sure it rests behind the latch on the foot. 

At this point, you should probably (definitely) make sure you have chosen the correct buttonhole stitch. You want the one with bar tacks at both ends. Consult your manual.

Now is the fun part- just gun it. The machine does the whole thing, reinforces it, and just stops when it's done. 


Repeat on the other side and you have two beautiful buttonholes. Except, you still have to give them the hole part.


Put a pin thru the top bar tack and use your seam ripper to make the hole from bottom to top. (Point sharp object away from yourself.)


Of course, every machine does things slightly differently, but most computerized ones will probably be similar to this. So read up in your manual. Mine also has a foot just for sewing on the buttons, which is fun since you know I like to avoid even the tiniest amount of handwork. But you really don't need a foot, you can also try dropping the feed dogs and setting a zig zag stitch on zero length and 3.5-ish width. (Width will vary with the button of course.)


So we still have a week to finish up, actually two weeks to join the link party at the end of the month since I always give a little grace time. And don't forget about this month's fantastic prize from Liesl Gibson. Have you thought about what digital pattern you would pick?? I would definitely go for the jumprope dress if I could win!


Monday, January 9, 2012

LTTSA: Bear Carrier Part 1- Fabric & Really Fun News!

Ok, I think I've finally recovered from the holidays and am back in the groove of my normal making. And I'm so excited to get back to our Oliver & S Little Things to Sew- Along!


This month we are working on the Bear Carrier. I figure a lot of little ones out there have new dolls and stuffed friends that might need a way to be close to their hearts. 


But of course, you can make any project from the book and link up at the end of the month. Have you tried the cozy winter hood yet? I would highly recommend that one too. Or maybe you could whip up some of those cute scarves like Tara did. Anything goes, as long as it's Little Things to Sew!


Today I cut out the pieces for my carrier. For the main part, I'm using nice gray denim I cut from a pair of my husband's old jeans. The lining, straps, and pocket are all fabrics from my stash. I gotta say, I'm LOVING the pink/ aqua/ charcoal combo. And I love that this project is a mix of old and new materials. 


The lovely mother of pearl buttons are from my vintage collection my mom gave me. I just love it when I have all the perfect elements right on hand. Next week we'll talk button holes! (Although you should know, I'm no expert. I've only done a few so I'm getting some practice too.)


Now for the exciting news about this month's sew-along prize. It's coming to you straight from Liesl G! Could there be anything better for our little group of Gibson groupies?? I decided to email her this week, and she graciously offered up a free digital download Oliver & S children's pattern to this month's winner. That means you get to choose from a few adorable out-of-print patterns. Check out all 4 that are available here. Thank you so much Liesl!

If you are new to the sew-along, we'd love to have you join this month. Read up on important info by clicking the sew-along tab at the top of the page, and be sure to leave a comment here if you plan to make something. All the fun is hearing from and helping each other- so don't be shy!


Thursday, December 8, 2011

LTTSA: Your Puppet Theaters, Winners, and Business


Whoa. Your theaters? AMAZING. I know you already saw them, because that's the point of a link party, but here's a review in case you missed it. 


Puppet Theater almost done!
Sarah's colors are just perfect. And how much do you love that little round window?


Alisa did a super- creative rainbow look. (It totally reminds me of the rainbow road level on the original MarioKart. Anyone?)


The brilliant Stacia decided to make it a pirate ship and it came out stupendously! And guess what? She doesn't even own the book, she just really wanted to make this for her son. She's a pirate of sewing. Yar.  


Sarah's attention to detail kills me! Her little windows are perfect. And I love the bows on the curtains. 

I'm so excited that you guys made this! Isn't it cool how completely different each one is? Lots of other cute projects this month too, can't wait to make some of those mittens and hats. 


Onto the winnings...

Out of all ten entries this month, the winner of the 2 pattern pack from Owly Baby is Sarah of Heirloom Farmhouse!


And who gets all this great loot? According to random.org, out of the 4 puppet theaters made, it's Sarah B!  The Sarahs sweep all. I'll be emailing you ladies.


So on the Sew-Along schedule I said we'd be making the winter hat from the book, or it would be a good time to take a break. Well, that's still true. I do plan on making one of those hats for Elsie this month, but I'll also be taking a break from doing any more sew-along posts until January. I have no prizes or anything, so feel free to make whatever, but we won't have a LTTSA link-up. I was thinking it might be fun to just have a link-up the week after Christmas where anyone can post their favorite handmade gift they gave this year? It would be great to see what other kinds of things all the sew-alongers make, and to include anyone and everyone else.

 But then we'll be back with a bang in January. All those new bears and dollies will need cute little carriers, right?


Wednesday, November 30, 2011

LTTSA: Puppet Theater Done!


Man, it feels really great to be done with my biggest Christmas gift project this early! I'm really happy with it and love the 1001 Peeps fabric on it, although it's not without it's problems. The biggest problem is that it's too big for our door frames. Simple measuring could have fixed that, but I'm not one for much forethought and convenient results. But I did kick myself for that. It fits ok, just a little bunched in. 

The other problem is that I didn't have any tools to be able to cut those thick dowels down to 28". So the part below the theater window is saggy for now, but I'm sure I can borrow something from someone to fix that problem. 

The biggest issue with this is that Hendrix got up from his nap while I was photographing it and his present is now a little ruined. The good news is he was really excited about it, and I'm hoping not seeing it for a month will elicit the same response on Christmas. Of course, by then it will have some new puppets to go with it. (probably store-bought. Ikea actually has really cute cheap ones.) I also might dress it up a bit more by sticking some of the Peeps people on the front. 


I think the curtains are my favorite part. I'm really glad I decided to put that strip of purple in it to pick up on the purple towers. And, yes I made the windows crooked on purpose. I had them placed all centered and even, and after staring at it til my eyes hurt, I finally figured out that it looked too nice and neat. They needed to be crooked like the windows on the print.

So, it needs some minor tweaks, but I really like it and I'm glad to know he will too. As I was making this, I realized that it was a LOT of work and took much longer than I had anticipated. That's why I decided to reward the efforts of those who made this particular project.

As always, I would love for you guys to link up whatever project from the book you made this month, big or small. I know not everyone had the time/ desire to make this one, in fact I'm expecting 5 or less of you did, which is fine and great. Everyone who links up anything will still be entered to win the pattern package from the lovely Owly Baby.

BUT! I will then do another drawing including just those that made the puppet theater and that winner will get an awesome prize package made up of my very own awesome destashings.


Super-Duper Stupendous Surprise Puppet Theater Prize Package:

  • Copy of Amy Butler's Little Stitches for Little Ones book. (very nice condition.)
  • One back issue of Stitch Magazine, full of free patterns.
  • 2 yards of that lovely linen I use all the time. (I used it for the house on the theater.)
  • 6 fat quarters (pretty stuff only, I promise.)
  • Ziploc stuffed with nice scraps. 
What? I know, awesomeness. I'm mostly doing this as a reward for your hard work, not a motivation to get more people to make it (although, hey you still have a week from now.) And as an excuse to get rid of some things that are nice but I don't have room for anymore. And because I'm just so happy to have you all sewing along!


Can't wait to see what you've made this month!