


Happy Monday! This is the fifth in a series of Christmas tutorials I've been making as part of the Holiday Craft Bash. Meredith, Jacey, Debbie and I are hitting you with a slew of fun Christmas tutorials, and you are making them for the chance at prizes. And for general crafting merriment, of course.
I picked the theme of classic Christmas movies early on, and in turn I've kind of been tied down to using a lot of felt and embroidery to be able to pull off these beloved characters. Not that I'm complaining about that- I love the felty vintage Christmas look all of these projects have! I definitely remember having lots of felt ornaments and other Christmas decorations growing up. Felt can be your best friend this time of year- just don't cheap out on it! Get the good stuff, it's totally worth it.

So this week is all about Frosty the Snowman. When I think about it now, this is definitely one of the weirder Christmas specials. I mean, that magician who was always hanging around the children was kind of a creeper right? Even so, my kids will definitely be enjoying some Frosty viewing this year. They went nuts for this advent calendar.
Supplies:
1/2 yard white felt
1/2 yard background solid. (I used Moda Bella Violet)
1/2 yard backing fabric
3 1/4 yards jumbo ric rac trim
12" ribbon
small pieces of felt in gray, black, red, blue and brown or gold
fusible web
25 2.5" squares of felt in the colors of your choice
black and white embroidery thread or perle cotton
water soluble marking tool
As usual, I found all of my supplies at Sewn Studio. The best :)

Lay everything out where it will be and draw on the face with a water soluble marker. I kept his grin slightly crooked like in the picture of Frosty I found, and his eyes large and egg shaped. Hand stitch the mouth and eyes on the white felt before you appliqué anything down. All you need to use is a simple backstitch, and some satin stitching for the eyes. Go here for embroidery help.

On the hat, first add the main gray piece, then the black band, then the flower and finally the brim.

An advent calendar needs numbers of course, so I also hand stitched those onto each of the 25 2.5" felt squares. It wasn't as bad as you might think, just a couple days of good naps. I just free-handed my numbers on, I like the rustic look of it.
Lay them out on Frosty in 5 rows of 5, centered with about 1.75-2" space on either side.

Pin and machine stitch each one down, going around the right, bottom, and left side. Leave the top open on each pocket. Remove markings.

Trim your backing fabric to the exact size of the whole front panel. Lay them right sides together. Starting at one bottom corner, put the end of the ric rac in between the layers, hanging a little off the edge. You will be using a 1/2" seam allowance around the edge, so the trick is to pin the ric rac in place so that the center of it is about a 1/2" in, right where you will be sewing.

Continue pinning around the perimeter with the ric rac in between.

At the top of the panel, add a length of ribbon about 6" folded into a loop. Place the raw edges along with the raw edges of the fabric, and place it in between the ric rac and backing fabric about 2" in from the corner. Pin in place and repeat on the other top corner.


Before turning, clip the corners really well, including all the bulky ric rac inside. Turn and press well. Press the opening you left under a 1/2" and pin with the ric arc in between the layers.

Top stitch around the entire thing about 1/8" from the edge. Take your time since there are a lot of layers to sew through.

Your Frosty advent calendar is now ready for December to arrive! We can't put nails in our walls, so I'm going to buy a couple 3M hooks to hang the loops on. As for the actual advent pockets, I think I'll go the route of writing a simple Christmas activity on a slip of paper for each day. You could also do small treats, or some kind of stick, candy cane, or felt piece that moves from pocket to pocket.
Looking for other felt movie-inspired holiday projects?
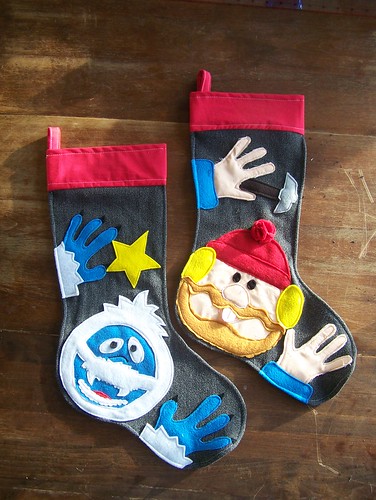
Please add these or any of the other tutorials you make to the Holiday Craft Bash Flickr group. Check it out, someone (Rachel?) made the Bumble stocking AND added Yukon:
I LOVE IT!!!
so cute Jessica! I love your non mushy Christmas projects!
ReplyDeleteHi Jessica, yes I'm Rachel:) not a blogger, myself, but read lots of them.
ReplyDeleteThanks for the Bumble pattern...I LOVE it!
Glad you like Yukon, it was a request from my brother(who is getting both the stockings)!
I'm working on the Charlie Brown ornaments right now, so I will post a picture soon.
Frosty may be next on the list of things to make
I loooooove this! Thanks for sharing! :)
ReplyDeleteHAPPY BIRTHDAY!! Love this advent calendar! Gotta decide which of your awesome projects to try first!
ReplyDeleteLove your calendar! So what is really good felt and where do you buy it? I've only bought the cheapo stuff or on the bolt at Joanns.
ReplyDeleteyou're a genius!
ReplyDeleteall of your tutorials are awesome but I am really loving the christmas goodies!!! Are you gonna do the lumber jack as an add on to the abominal snowman? You captured them sooooo very well!
ReplyDeleteI think my sister and her hubs need a set.
What a great pattern. Really simple and straight forward. And the Christmas socks are really funky. Love them!
ReplyDeleteyour tutorial is awesome jess! i just love this, as usual! xo also, i totally started watching the walking dead and cannot stop! i watched an episode and a half before i came to work this morning! i love it!
ReplyDeleteYou are just awesome. I love your take on these projects, and I might have to out and buy some jumbo rick rack. It just looks so fun. I'm also a fan of rustic freehand stitching. xoxo
ReplyDeleteFun project! Im a Walking dead fan too. We made up a dance called the zombie dance for it.
ReplyDeleteThis is adorable and I'm totally impressed by the stitched numbers. Huge Walking Dead fan here. I'm just about dying over the last few episodes.
ReplyDeleteI love this- LOVELOVELOVE advent calendars and this one is perfect. The embroidery is awesome. :)
ReplyDeleteAny idea on when/if there will be a tutorial for the Yukon stocking???
ReplyDeleteFawn