

This post is part of the fantastic Stretch Yourself series hosted by Miriam of Mad Mim and Miranda of One Little Minute. (I feel like they should have called it "Mmmm... Knits." But that's actually not very catchy. This is why I've never hosted a series before. I actually suggested to a friend tonight that she call her series Fashion Unicorns. I was mostly serious.)
Today I'm talking about embellishing a basic. For the past few months I've been kind of fixated on hand embroidering designs onto knits. It's not something I ever would have taken the time to do when I first started making my kids' clothing, but now I visualize stitches on everything. And when it comes to stitching onto stretchy knits, it's not as problematic as you would think. All you have to do is be careful not to stretch too much as you stitch.

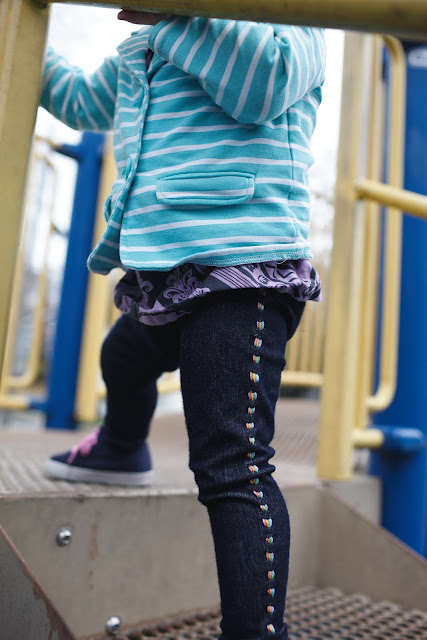
Leggings are kind of the ultimate knit basic for girls this time of year. I wish I had 3 dozen varieties of them for my daughter Elsie, all hanging in the closet on one of those automated tie racks. I made this pair using the Go To Leggings pattern, which was so great and has some wonderful options and tips for knits. I so enjoyed this pattern and will use it for years, I'm sure.
The hand stitching was really not as time intensive as you might think, and the small detail adds big appeal.

First let's talk about the supplies. You will need a hand stitching needle with a large eye, like pebble or tapestry needles. You can use regular embroidery floss or perle cotton. These are inexpensive and fairly easy to find. I've been growing my small collection of thread colors and now I usually have what I need on hand. My little rainbow consists of pink, orange, yellow, green, blue, and purple.

Put your legging pieces together and hem the bottoms. Do not put the elastic waistband in yet. Press a nice crease into the sides of the legs.

Thread your needle and knot the end of the thread. Starting where the crease meets the stitch line on the hem, bring your needle up through the wrong side. I began with green because that's in the middle of my rainbow.

Go back into the fabric about 1/4' up and go in and out a couple more times before pulling the needle all the way through. This is called a running stitch and it goes pretty fast because you can do a few at a time like this. Just make sure you are only going through one layer of your pants!

Here is what it looks like after you pull the needle through. I use fairly large 1/4" stitches here so that they are more visible on the pants.




Trouble.
And since I know you are going to ask, that super cute blazer is from Target, I didn't make it. But I'd love to try making this pattern with a knit.
Now you can head over to check out the (Whoa, infinitely more talented than me, wtf?) super lovely Lladybird for something a little more grown up. Not that grown ups can't wear jeggings with rainbows stitched up the sides, they totally can. And should.


