Monday, September 9, 2013

Oliver & S Playtime Dress


Elsie totally looks like a Scandinavian doll you could put on a shelf right? I was so happy to get a chance to stitch up the brand new Playtime Tunic and Dress pattern from Oliver & S. It's a great pattern! The design is classic and simple, but the pattern is well-contructed and super versatile with options to make a tunic or dress, in wovens or knits, as well as a legging pattern. (Which I didn't make here, but I'm sure I will put to great use this fall!)


I actually made a small and simple change to the pattern by sewing the facings on the outside. As the pattern is written, they go on the inside of the neckline and back bodice pieces and the shape of the  front facing goes straight across. But there is a really cute option to topstitch them down with stitching in the shape of a peter pan collar, which you can see here on the O&S blog. Since I chose such a bold solid linen for the dress, I figured a visible "collar" in black would be really striking. (I'm pretty sure you can't call it a real collar if it's topstitched down!)


To make it happen, I simply changed the front facing pattern piece to that peter pan shape, and then cut  2 of them out of the black fabric, plus 4 of the back facing. I decided to still interface one set of the facings, but if I did this again, I wouldn't. It's slightly too heavy, and made it a little more difficult to do the buttons and buttonholes on the back. 

Anyway, you then sew the two sets of facings together around the outside curve, turn it right side out, and then sew the right side of it to the wrong side of the bodice. Then you turn it to the outside of the dress, understitch the seam allowance, and topstitch around the whole thing from the right side. As soon as I finished that part, I realized I should have sewn my shoulder seams differently. In the picture above, you can see that the seam allowances stick out right up the collar. (And I have no idea why I didn't finish them all the way to the edge.) What I should have done is the same thing you do when you sew the outside facings on the Class Picnic shorts. So next time, I'll sew the inside inch of those shoulder seams wrong sides together, then switch to RST for the rest of the seam. That way, the seam allowances will be hidden under the facing on the outside. 

So I just explained way more detail than most of you probably need, but would anyone be interested in a little picture tutorial for this modification? We could probably make it happen.  


Elsie must be getting annoyed with all the technical sewing talk. We should move on!

The fabric is a gorgeous Robert Kaufman linen from Sewn Studio. As lovely as it is, I doubted my choice here more than once. I mean, have you ever seen me use so much pink? I don't use it for Elsie's clothes even in normal garden varieties, much less electric shocking pink. In the end, I love the color. Sometimes you just shouldn't fight the pink. I also worried that it would look too wrinkly, but I love the way it drapes in this dress, especially on that full gathered skirt.

I made mine in a size 2 with the skirt cut to 3 length. I probably could have gotten away with 2 length, but the long skirt looks a little fancier, and she won't soon outgrow it. (I should also mention the long sleeves are rolled up once in these pictures.) 


It needed an extra something, so I added two beautiful ribbons from Sewn around the bottom. We have so many new ribbon designs in the shop and I couldn't wait to use them on the perfect project. I love the way they cover up the stitch line on the hem and almost look like one ribbon instead of two.


The back has three simple white buttons, which I only chose because it's what I had on hand. But the contrast on the black turned out nice. And I love the shape of the those back facings on the outside as well. 


Elsie has strep throat and grew tired of this photo shoot very quickly. But she didn't want to take the dress off! She absolutely loved it, I'm guessing because of the easy shape and super-fun color. I can't wait to sew another one in knits with fun leggings to match. It's such a great staple pattern to have for fall, and I imagine this particular dress will be making an appearance on this year's pumpkin patch portraits. 

To see just how versatile the pattern is, definitely checkout Cherie's adorable knit version of the tunic and leggings. I can't get enough of that Yuki.


You can buy your own digital or paper version of the Playtime pattern from the Oliver & S website. Just like in the spring, Liesl was kind enough to send the new patterns to Cherie, Kristin, Gail and I a little early so we could have some fun with them. We'll be rolling out our results all week, so keep your eye out for more!


Thursday, September 5, 2013

Of Late


Just when I thought I was getting back into the swing of blogging, Hendrix stuck a big magnet on our Macbook and we had to get a new hard drive. We lost some pictures. And other things. Don't cry for me though, it's just stuff. We still have plenty of pictures of the important things. (kids.) But for now, I just have a few instagram shots to show you some things I've been making. You can follow me at @alittlegressica if you are on IG.


I've been working on a new scrappy project on and off throughout most of the summer. I've made 30 of these stars, all mostly from scraps and each block with it's own story. It's an adaptation of Elizabeth Hartman's Superstar pattern from her first book.  Now the top is actually all done and I love it so much that I'm fretting about the quilting. Quilting anxiety!


I made this large tote for my mom. She works in a school and is always toting things there and back and forth to church. And she deserved something new and something in her favorite color, just because. The outer and lining prints are from Amy Butler's Cameo line, which I got at Sewn Studio. The contrast bottom is a very nice lightweight denim by Robert Kaufman. I kind of just looked at some pictures of totes and made up my own design. It's nice and sturdy with shapeflex and fusible fleece inside, plus a panel of Peltex in the very bottom.


And I made these zipper pouches for Hendrix's triplet friends that just started Kindergarten. Is there anything cuter than kids starting Kindergarten? No better occasion for cute pouches.


Now that our computer is sorted, I'll try to get some proper pictures of another quilt I just finished and some other projects. And coming up next week, I get to share some really fun things I've been working on along with Kristin, Cherie, and Gail. DREAM TEAM!


Tuesday, August 20, 2013

A Sleeveless Class Picnic (with mistakes and shoddy sewing!)


I made this little outfit for Elsie back in April during the spring KCW. Obviously, that was a long time ago, and at this point I almost decided to just skip blogging it. But I changed my mind about that because:

 a) It's a pretty cute and easy modification to the Oliver & S Class Picnic top, b) It has some shoddy sewing that you should probably see, and c) It's kind of interesting to see the clothes blogged after lots of wearing instead of in their normal new and pristine state. 


First the changes to the pattern. As you can see, I left off the quarter-length sleeves on the top all together. I sewed up the front and back yokes with their facings like normal, but then I just sewed thin bias tape around the arm holes with lots of extra inches to make cute shoulder ties. I also took in the side seams about half an inch just to make sure the armpits didn't gape too much. The shorts are sewn according to the pattern  (Cutest shorts pattern ever, for sure.) Simple as can be and perfect for summer. You can see last year's version of this outfit here. 


So now let's get to the good stuff that makes you feel better about your sewing imperfections, K? Here you can see on the back that my bias tape tie doesn't cover the entire raw edge and it's visibly frayed. I really should have made the tape a little wider, or just sewn it on more carefully. I even picked the seam out once and tried to sew it on again to cover, but I guess it didn't take. It happens. My home sewn clothes aren't always completely perfect and I think that's probably good to show you! It's still a super cute top on her and no one can notice the fraying under those ties. 


The other problem with my frenzied KCW sewing showed up after washing these shorts a couple times. For the gray denim, I cut up an old pair of my husband's jeans. Then I picked out the trim from my stack of fat quarters on the shelf, which are not pre-washed. I usually pre-wash any larger cut of fabric that I'm going to use for garments, but I don't wash my quilting stash. But I was impatient. Between not being pre-shrunk, and being much lighter in weight than the heavy denim, you can see how the trim got all scrunched up and turned up the wrong side of the denim so it's visible. Again, not ideal, but they are still cute shorts that she wears all the time. It happens.


Both pieces are size 2, and you can get this pattern in paper or pdf versions. The fabric on the top is Lizzy House's Hello Pilgrim and the trim on the shorts are her Pearl Bracelets. (PB's I can't quit you!)

Moral: you are good at sewing. Don't sweat the small stuff.


Thursday, August 15, 2013

My Starry Washi


Let's just get one thing out of the way: What the hell am I looking at? Modeling skills need some serious work, but I'm sewing more for myself lately so hopefully things will improve. At least I don't have my fingertips in my armpits.


Anyway, I made a Washi Dress! Back in February, for pete's sake. It was the first time I've made a real dress for myself and I love the way it turned out. In fact, you can probably tell I've worn it and washed it a whole lot. The fabric is Constellations in black by Lizzy House. (I bought it at Sewn way back then, not sure where/if you can still find it.) The black isn't actually as faded as it looks in these pictures. I originally made it to wear to my younger brother's rehearsal dinner at his weekend wedding in Vegas. It was really fun to make something custom for such an event, instead of shopping (blech.) It was definitely the right pattern to get my toes wet with garment sewing and make me warm up to the idea of doing it a lot more. It just feels good.  I wear this dress to work mostly, and get compliments on it all the time. Not sure if that would happen in a different work environment, but I'll take it!


I made an XL and it fits perfectly. It really helped to make a bodice muslin first to make sure of the fit, good advice from my buddies Kristin and Cherie. I think I read their Washi posts multiple times that week. The only tweak I made was to add one more line of shirring on the back, under the existing six lines. The middle seemed just slightly too big when I finished it, but that was the perfect fix. Forgot to have my husband get a picture of the back of the dress, but I do love the look of the shirring. It was a small struggle to figure out how to do that on my Brother (notorious for tricky shirring), but once I did it was a breeze. Rae, the pattern maker,  actually put up a very helpful shirring post recently. 


Sooooooo, wanna make one with me? I'm teaching a Washi class at Sewn Studio starting next Wednesday and there are one or two spots left. I've already taught the class a couple of times and it's tons of fun. If you are in the Cincinnati area, go here for more info!

Next week I'll try and get pictures of the tunic version I made this summer. I'll also try to work in some more Ron Burgundy.  


Monday, August 12, 2013

New Picnic Quilt


I've had a stack of fat quarters picked out to become this picnic quilt for at least a year and half.  It's evolved a little since then, but with half of this summer left for picnicking, the stack finally became a useful quilt! In fact, we've been taking it out regularly for over a month, and even in these pictures it's fairly covered with dirt, smashed bugs, and PB&J stains. It's so nice to have a quilt just for taking out to get dirty. 


Hendrix was a great guardian as I took these pictures at the park the other day. (Two birds, one photo shoot.) The kids really love this quilt. It totally makes a picnic somehow feel more picnic-y. We didn't join a pool this summer, so the season has been marked with making constant rounds around the city's parks, accompanied by the new blanket. Really, Cincinnati has such great parks! We are lucky.


I think it's about 60" by 72". Can't be positive, because I'm too lazy to get up and measure. The fabric selections started with 6 of my very favorite prints from Amy Butler's Lark line. Love how saturated the colors are in that one. Then I added some B&W, the ever-present Lizzy House Pearl Bracelets, some Cloud 9 Cut Out & Keep, and a little Lu Summers Summersville. Plus solid white and other coordinating scraps. The squares were cut to 5" unfinished. I put it together fairly randomly, not really planning what would go where. I just paired light with dark together initially and tried to keep the black spread out. Chain piecing made this quilt top come together super fast, even at this large size. 


The quilting is just a quarter inch on either side of every seem, both vertical and horizontal. It's not my most perfect quilting job, but definitely good enough for an outside quilt. 


The binding is a light sketchy plaid from Angela Walter's first line for Art Gallery, which I picked up at Sewn while having a fun girl's sewing night there with my awesome boss and her daughters. It's so fun to finish a quilt while your actually with someone who knows how exciting that feeling is! I should arrange dates with encouraging sewing friends for every time I finish the binding on a quilt. Binding party anyone?


Friday, August 9, 2013

Briar Rose Pinafore


I made Elsie this Roly Poly Pinafore just a day or two after Briar Rose by Heather Ross arrived at Sewn. 

The truth is, I've never been a Heather Ross person. I know it's blasphemous in this business, but I only own 2 fat quarters of some of her Kokka stuff because Caila sent it as a very sweet gift. I've never searched high and low for it and broke open the piggy bank for it. (Actually, that's a good idea. I should get an actual piggy bank for fabric money.) I get the obsession, but just never cared enough personally. You know me, I'll always go for strong colors and patterns over sweet and vintagey. 


Then these Briar Rose strawberries happened. I was powerless against them. They are perfect and I bought the green and the pink color ways as well. And since I wanted to see them in use pronto, this super-quick pattern was an obvious solution. 


I made one of the back panels contrasting with a little old-school AB.  Midwestern Modern will always be the best of Butler, am I right? I like the way the colors play nice with Briar Rose. 


And while I can never get enough of the strawberries, Elsie is smitten with the frog side on the reverse. Which is understandable, since they all seem to be participating in the most adorable summer scene ever. And from the looks of her legs, Elsie has been trying to recreate it.


The sweet back. All frog action on this side, no contrasting panel. And I should probably confess at this point that there may be more photos included in this post than is absolutely necessary, just because her hair was looking so perfect today. Thanks morning rain and humidity. 


Hair. Frogs. Face. Buttons...  See? I ran out of things to say before running out of pictures to show :)


Sunday, August 4, 2013

Lizard Geranium


I made this size 4 Geranium dress back in May for my best friends' daughter Lily. (You may remember her as my part-time Project Run and Play model last year.) Her mom asked me to make a dress for her to wear at the birthday party, so I had her come into Sewn Studio (where I work) to pick out the fabric. 


This Sarah Watson Extravagarden print had been in the shop for a while. I love the whole Luxe in Bloom line, but I hadn't really paid a lot of attention to this one on it's own. But my friend picked it and pointed out the lizards hanging out there on the flower stems. Suddenly I was in love with it! I can't believe I had never noticed those chartreuse critters before.


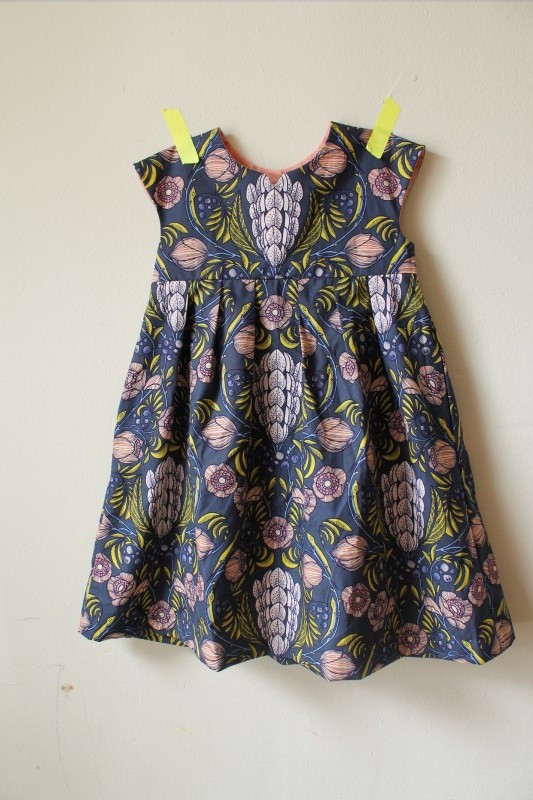
For the bodice lining I used a coral Kaffe Fassett shot cotton. I just love that stuff. Someday I'll buy a lot more of it in every color. I just love how perfect this color is with the main fabric, even if you never see it. A secret perfect detail. I didn't get a picture of the dress on Lily at the party, but her and her mom were both happy with it.


Here's a shot of how those lizards look scurrying all the way up the back. The print is a really gorgeous repeat that worked well on the Geranium pattern. I'm so glad I got to use it, even though I might never have bought it for myself!