Tuesday, July 30, 2013

Scrappy Star Mini Quilt and Portland Weekend

Hi! It's been a while, huh?

I took an extended summer break while we were lucky enough to take several little vacations over the past couple months. Plus, it's been a beautiful summer here. Who can sit behind the computer and blog when it's 75 in July?

But I have been sewing a lot, and I think I'm finally ready to get back into the blogging habit. Because I like sharing with you guys here. Or maybe I just like being able to blather on about the gritty details of sewing that no one else really cares about. Either way, we have a lot to catch up on.


So one trip I took since you've seen me last was a weekend in Portland. I went by myself to meet and hang out with Kristin! Yup, me and my long-time bloggy partner in crime, together in the flesh- FINALLY!

I decided to bring Kristin a handmade gift to show her how grateful I was for putting me up all weekend and dragging me all over Portland. Seriously, she was the best tour guide. I don't think we could have packed any more good Portland food and fabric into the two full days I was there.
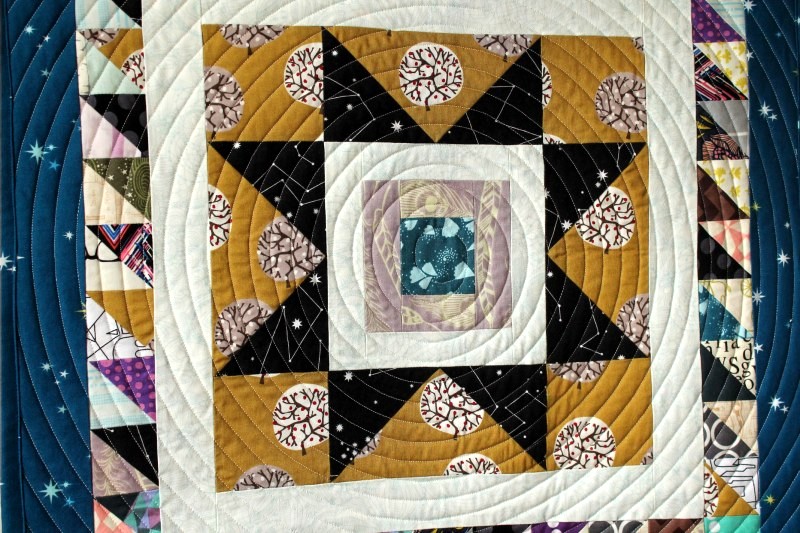


This mini quilt began as just the center star block, which was actually made for another scrappy quilt I'm working on. But Kristin expressed affection for this star on Instagram, so I decided to swipe it from that quilt. I added three more borders to it, one of which is scrappy half-square triangles made with dark and light fabrics picked to coordinate with the feel of the colors in the star. I'm not sure what to call the color story in this mini... Warm cosmos? Earthy deep space? I don't know, but I like it. 


The quilting might be my favorite part of this. I don't know why I've never tried this spiral/ concentric circles style. I just started in the center and used the width of my walking foot as a guide. It was pretty easy on a quilt this size and I love the effect.  Totally hypnotic. 


On the back, I had to sneak in a little piece of Film Petit memorabilia. The ferris wheel is fabric leftover from the lining of Elsie's coat in the Hitchcock edition. I was happy that I  remembered to add little hanging pockets in the corners, I never remember that for wall hangings. I bound it by machine with the same fabric as the final border on the front, from Lizzy House's Constellations, from Sewn Studio.


I think the quilt ended up about 24" square, and now it's hanging in Kristin's sewing room. Which I've been to!


(picture swiped from Kristin of course. I was too busy laughing with a gaping mouth to take any pictures.)


It was sooooooo good to finally get some time with this girl. She inspires me in a lot of ways. And maybe my friends and family won't think it's so weird any more that I'm constantly texting my internet girlfriend, because now we've met in real life :)


Thursday, June 13, 2013

Film Petit: Napoleon Dynamite


....present friggin' Film Petit. Gosh.


It's a good thing Hendrix was in a very foul mood for photos. His new anti-pictures stance is very Napoleon. 


Rex has always been one of my very favorite parts of this movie. I love everything about him. "Fugit about it!"


I think I'll just fill this post with Rex gifs. No one would object to that, right?


"You're gonna learn to discipline your image. You think I got where I am today by dressing like Peter Pan over here?"

As hysterical as the roundhouse kick pants would have been, the kids needed summer play clothes. So Hendrix got the racer shorts version. I'm sure he could still roundhouse things in these though. I got to use a new pattern that will be released soon from Dana! It's a great pattern, for girls and boys with lots of options. Keep an eye on Dana for its release. I used Lizzy House's Constellations fabric and Riley Blake chevrons from Sewn Studio


 Elsie's kind of Kip from the waist down and Napoleon from the waist up. I made her shorts using Dana's same upcoming pattern and a very nice Robert Kaufman denim. So nice to sew with. I even put lion/ tiger fabric on the pocket linings, but forgot to take a picture!


So, we're pretty much friends by now right? So you got my back and everything right?


On my freezer-paper stenciled shirt, I changed the horse to a llama in honor of Tina. It's so quietly weird. Kinda like the movie. Even though it's not exactly cool anymore to go around dropping ND quotes, they are still just as hilarious as ever. I love it.


Whoa you guys: to see how the pros do it, you have to spend some quality time with our beautiful guest Delia Creates today. WHOA. She is the one who made that awesome intro banner for us too- amazing!! She made THE perfect Napoleon pants, plus hilarious tees and an adorable little Pedro outfit.  And to top it off, she took pictures at the real setting of the movie! Delia has seriously been the sweetest most patient guest ever. Thank you for everything girl!  Go now, it's friggin sweet. 


And Kristin perfectly recreated one of the most hilariously awkward scenes in any movie, let alone this one. Her little Deb and Rico are ADORABLE. See it at Skirt as Top


So that wraps up another edition of Film Petit. You can catch up on past installments here... I'm gonna go practice my sweet dance moves. 


Tuesday, June 11, 2013

do. Good Stitches Flying V Quilt


I finished this quilt a few weeks ago and finally took pictures today. This is definitely my favorite DGS quilt yet! Do Good Stitches is a charity bee I've been in for nearly two years. Every few months, I get to be the designer of the quilt my circle of the bee makes. 

This one was inspired by my friend Andie's minimalist flying geese quilt, featured in her awesome book. 


Of course, mine couldn't be quite as minimalist as hers, or else my group wouldn't have had much sewing to do! Instead of the standard 2 12" blocks, I instructed everyone to send me a strip of 12 flying geese units all joined together going the same direction and on a white background. They each finish at 6" x 3". 

I told them to block the colors together instead of mixing them all up, and to use this block for color inspiration:
Japanese + & x


They matched those colors pretty perfectly right? It's my most favorite block from my scrappy Japanese +&x quilt.  


So once I had everyone's strips in the mail and made my own, (second from the right side is mine) I added more white fabric on either side of the geese and joined them together, staggering one unit off with each one, and alternating directions. Originally, I imagined them all going one direction and all facing to the side of the quilt, rather than going vertically. But once I laid everything out, this way just looked much better. Flexibility is my middle name. (Actually, it's Elaine... I know you were wondering.)


I did straight line quilting, vertically just like the geese, about 1/2" apart. With all that white space, I knew I wanted to do heavy quilting. I think the simple straight lines are just perfect here. Always my favorite. 

The binding is the dictionary text print from Moda's Mama Said Sew, ordered a while back from Pink Castle. Except that one little spot where I ran out and had to use some Flea Market Fancy. (See? Jessica Flexibility McFlexyFace!)


The backing is all this pretty Vintage Modern print (Bonnie & Camille for Moda) from Sewn Studio on clearance. I just love the color.

I didn't wash this quilt before taking pictures, which is the opposite of my norm. I just wanted the smooth look for pictures, but I'll definitely be giving it a good wash-n-crinkle before dropping it at Project Linus this week. It's a good thing, because I've already got most of the blocks in for my next do good quilt!


Tuesday, June 4, 2013

Pillow Talk Swap 10 (Let's talk about fabric.)


I think most of us have a fabric comfort zone right? Most of it has to do with taste, but some of it has to do with confidence. Like sometimes, you might really like a certain type of fabric but you fear you might not have the skill to do it justice. Like it's too unfamiliar to wield it's power. 

I think this project was out of my comfort zone for both of those reasons. If you aren't familiar, the Pillow Talk Swap happens on Flickr between about 100 quilters and sewists from all over the world. Being in its tenth round, it's gained a certain level of expectation. If you join that swap, you do not want to be the one that makes a clunker of a pillow. (Round 9 was my first time joining, you can see the pillow I made last time here.)


So my partner likes things that are light and girly and pink and vintagey. I appreciate that a lot, but it's not my zone. I need edge and angles and contrast and some black in there somewhere. But that is what makes these things fun and stretching right? 

Before I whine too much about these fabrics not being my style, I should say that I really do love them at the same time. Is that weird? I do, I think they are gorgeous. They are mostly from Liberty Lifestyle's Bloomsbury Gardens line and I picked them up at Sewn Studio.  If you didn't know, I work at Sewn and it's a really beautiful modern fabric shop. Here's the thing that's happened to me since working there- I just love every fabric we have. Yes, I still have my tastes and I definitely can't buy and use all of it, but nearly every bolt that comes in the door makes me think about what I would do with it. And even if I kinda "hate" the style of it, I still love it because it's pretty fabric. If we had not got this Liberty stuff in at the shop, I never would have even considered buying it online or anything. I wouldn't have paid any attention. But then you see it in person, and it's just PRETTY. And then you touch it... case closed. I may complain about it's girly-ness, but if I'm being honest I needed an excuse to buy it. (And it was actually my second time buying it, so what does that tell you? Who am I?) 


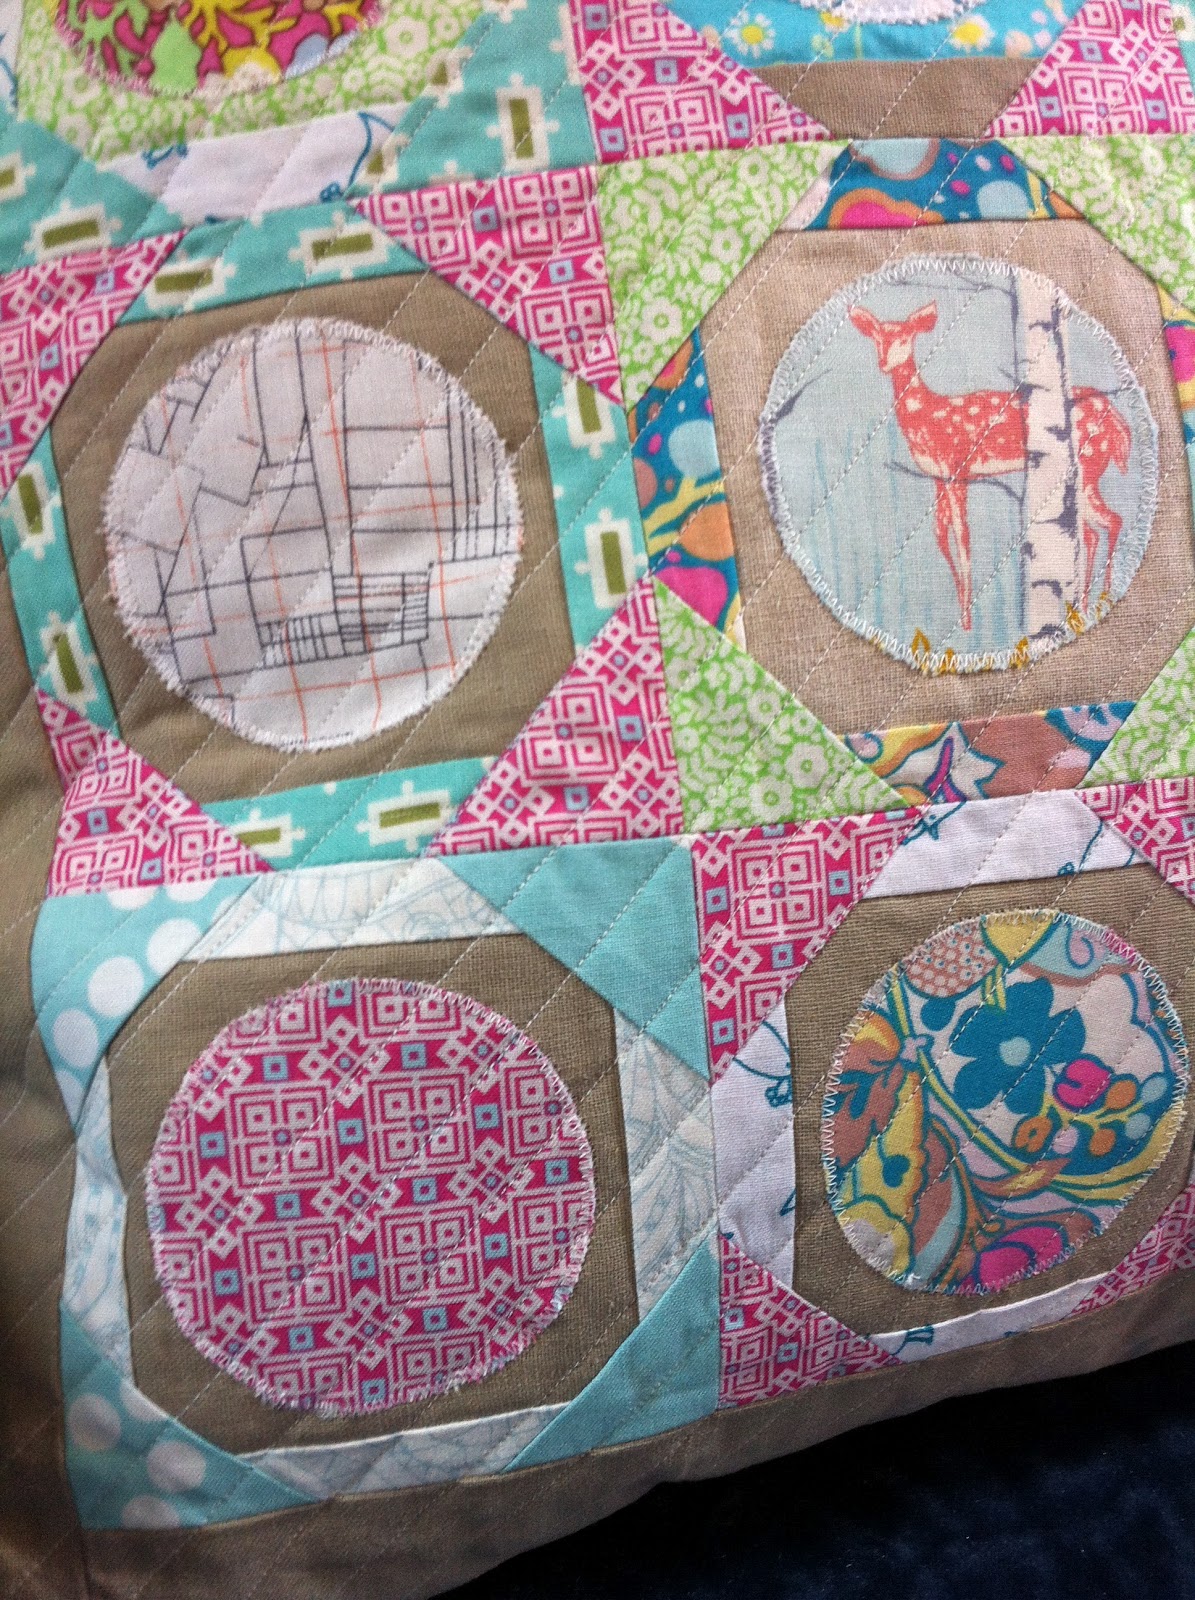
The pillow is made up of 16 little 4 inch "tea plate" blocks. At least I think that's what they are called. I saw them in a random quilt block book at the store one day and thought they had a great vintage look that would go with my fabric pull. Plus they seemed like they would lend themselves to playing with low-ish volumes and a bit of linen. I don't normally go for something involving appliqué anything, but it really wasn't that painful. I added one linen border and quilted with close together straight lines on the di-ag. That quilting is definitely my zone. I had to hang on to one shred of stubbornness here.

So although this was one of those projects that had me wondering if my choices would actually work out the whole way through, I think most of them did. I'm happy that I made something I like even though it isn't something I ever would have made for myself. But most importantly, I think my partner might love it and I really hope she does. It's on its way now!


This is the new project I'm working on now. Simple block, scrappy, all circles and geometrics, with a limited color scheme involving brights with some gray and black. That is totally my zone. It's funny because someone commented on this IG picture (I'm @alittlegressica there) that they were "glad to see me back" because that pillow cover I had been posting had them a little worried. I kind of love that, because it means to them I have a certain style. Sometimes it's hard to see that in yourself, but I'm seeing it now. I don't think that person was being mean about the pillow, it's just not something they expected from me. It's a very nice compliment. 


So just to make sure I'm not a crazy person, could you tell me about your fabric zone? And what's the type/line/substrate/designer of fabric you might like, but are also slightly afraid of being clumsy with?


Friday, May 31, 2013

2 Quilts in 4 Days

As in I started and finished two quilts last week, within four days. Sometimes I'm really good at convincing myself that some crazy sewing task will be much easier than it actually will be. And then, once it's started, there comes a point when I realize I was way wrong. But then at that point, not finishing would be a giant failure.  Totally rational right?


Friday was Hendrix's last day of preschool, which was really a big class picnic at a park. I started thinking about gifts for his two teachers on Monday. Again, I'm not really sure that there was a lot of logic that led to the decision that I would "just" make them each a simple quilt by Friday morning. But that night I picked fabrics for this first one and got it cut and mostly pieced. 


These were nearly all fabrics I've used in recent projects, so I really enjoyed the challenge of picking a cohesive scheme from just scraps. I knew this teacher liked purple and fun, bright graphic things. So I started with the light purples and the pink Melody Miller typewriter that was leftover from this bag I made last fall. From there, it was pretty natural to go with some more pinks, the navy ships, and some aquas and limey greens. I also really liked the idea of that dark green moon print from Tula Pink's Nightshade, but was nervous about keeping it in there. It was leftover from Hendrix's Halloween bat wings. But once it was all together, I loved it. Every quilt needs that "out of left field" kind of fabric. 


So for each quilt, I only had to buy some backing and binding, which I of course went to Sewn Studio for. I don't know how anyone lives without a good local shop nearby for this kind of thing!

The white print on the back is from Julia Rothman's new Ride line. It's little bike gears, but it just looks like a really fun dot. I might need a bolt of it. The binding is from Jay McCarroll's Center City line. The quilting is just a quarter inch on either side of all the seams, plus a diagonal grid in the same way. 


So by Tuesday evening this top was pieced as well. For the other teacher, I knew she might like a little more conservative color scheme. I started with the Joel Dewberry Deer Valley print in red and then added some dusty blues and golden yellows. And even browns! I almost never use reds or browns, but I loved this color scheme once it was all together. This was also a lot of scraps, but I had to cut into a few fresh fat quarters in my stash too. 


With both of these quilts, the initial fabric pull got changed up a little once all the cut squares were lined up. On a quilt like this, it would be impossible to get it just right the first time. Well, for me anyway. Usually, you lay everything out, notice a couple of the prints don't quite work, then go dig around for the replacements. That's all part of the fun. 


Here on the back you can see my quilting a little better. This was definitely the biggest quilt I've ever done an all over free-motion design on, and I'm so happy with how it came out! I recently sat in on my friend Millissa's free-motion class at Sewn. Just hearing her tips and watching her do it helped me improve so much. Just buying quilting gloves made a huge difference for me. The best thing about quilting this way was how fast it got done. The worst thing was how bad my neck hurt afterward. Gotta figure out how to avoid that!


I went with solid red binding and this great backing fabric from Timber & Leaf by Sarah Watts. I had Hendrix write his name in the bottom corner of each quilt back and I wrote the year and who it was for.

So they both got finished pretty late Thursday night. I was so relieved, and SO TIRED. Nick helped keep the kids out of my way a lot during those couple days, which was very sweet. He must have seen I had my sewing crazy eyes on. But it was all worth it because Hendrix was so excited to give them to his teachers and they absolutely loved them. They both mentioned how perfect the colors were for them. Sometimes you just wanna make everyone a quilt. You can't, but I think the ladies who made Hendrix love his very first year of preschool really deserved it. Plus it was fun.

They are both made with 36 squares, 10" unfinished, which makes about a 57" square throw quilt. So if you wanted to make this kind of thing even faster, a precut layer cake would work great. I don't think I normally would have made something so simple if I hadn't been time crunched, but now I want to make more just like them. Sometimes simply letting the fabric choices and quilting be the stars of the show is really satisfying.


Saturday, May 25, 2013

Quilts for Boston (and a winner)

You may have heard about the Boston Modern Quilt Guild project to collect quilt blocks and assemble them to give to those effected in the marathon bombing.


The deadline is past to send in your blocks, but a few days ago, their blog said they had collected over 1200 from around the world. Amazing. They have quite a job ahead of them finishing up all those quilts! Thank you so much to the BMQG for providing us with a tangible way to sew up some love for that city.


So these are the four blocks I made to send in. The design I ended up with was a very happy accident that started at our last sew-in with the CincyMQG. I had planned on working on some Boston blocks there, but I was running late for the sew in and ended up just grabbing another project that was ready to go. But when I got there, member Sheila was also working on some great HST blocks for Boston. Her problem was that she had cut way too much fabric and wouldn't be able to assemble them in time, so I was excited to start sewing her fabric up. 


Instead of making HST's with the 6" squares she had cut out, I made disappearing 9 patches. But they ended up way to big for the 12.5" block requirement. So I slashed them up (disappeared them?) again, mixing all the pieces up. Then they were a tad to small so I slashed a couple more times and inserted a scrappy 2" wide strip in each direction. Those were actually they only parts that were my own fabric. 


I love the way they turned out! I definitely want to make a whole quilt this way at some point. Maybe using all low-volume and solid scraps? 


Make sure to check out the BMQG site for pictures of the quilt tops they are already beginning to finish up. And I also like to check the #quiltsforboston tag on instagram sometimes. (I'm alittlegressica there.)


Looking for the Roly Poly Pinafore giveaway winner?

It's #33 Mary Ann. Congrats!! And a have a great holiday weekend everyone!


Tuesday, May 21, 2013

Roly Poly Pinafore- Review and Giveaway


Welcome to my stop on the Roly Poly Pinafore blog tour. This is a new pattern from my in real life friend, Rachael of Imagine Gnats

Let me tell you about Rachael. She is really funny, really generous, and totally going places. I wish I had her drive! I've never known someone who can bring ideas to life as fast and as well as she does. It's like she just goes around whipping her world into shape. I can never wait to see what she does next!


So this pattern is one of the most recent accomplishments from Rachael. (Hey, I think I'll try writing children's patterns...poof! Nailed it.) It's downright adorable. And it's also quick, easy to make and fun to pick fabric for and customize. What else could you need in a  summer pattern?

For my version I used a Lotta Jansdotter dot from here Bella line, and the glasses print from Riley Blike's Geekly Chic. Both were stashed from Sewn Studio, and I had been waiting for the perfect opportunity to use them together. The lining is a lovely and light Kaffe Fassett shot cotton my mom got for me at a recent quilt show. (Thanks mom!) 

The skirt she's wearing here is a corduroy Oliver & S Sailboat skirt I finished up during KCW. 


I love the sweet pleat detail that Rachael added to this classic kids shape. It's perfect. I chose some great tealy-green buttons for the shoulders from my vintage collection. (They really bring out the food on her face.)


This is the second day in a row Elsie has worn this top. It just looks great with everything and I want make her about a dozen now. I love how sweet her shoulders look in it and when her little baby back peeks out.

She is normally wearing a 2 in most patterns, but for this I cut a size 1 but lengthened it to a 2. I'm glad I read Tara's post about that before making mine. (You have to check out her version, it's geniusly cute!)


Even though I honestly think you should run and buy this pattern immediately, Rachael has been kind enough to offer a giveaway to one lucky reader. To enter, just leave any comment. Please remember to include your email so I can contact the winner! One entry only please, open to anyone.