Showing posts with label pockets. Show all posts

Tuesday, July 17, 2012

Metro Pocket Skirt Tutorial


I made this skirt as a part of the fantastic Skirting the Issue event at Project Run & Play and Simple Simon. Liz and Elizabeth have put together a great effort to get at least 100 skirts donated to girls in foster care by August. There are even crazy-good prizes available for those who upload pictures of skirts made to the flickr group- ahem, a new sewing machine for one!


Inspiration
This skirt had several sources of inspiration. At our quilt guild last month, a member gave a little presentation about how to make and use prairie points. It's basically just folding squares of fabrics into triangles. They are not something I would probably ever use on a quilt, BUT then I saw a dress at Anthropologie that had really cool pockets shaped like this. I immediately thought of the prairie points. So because the fabric is folded and crosses over in different directions, I really wanted to do it in stripes. After spending $20 on some nice striped fabric, I decided it was not the perfect thing after all. (Of course. Yeesh.) There was not much left to do but look to my stash. I remembered the dark teal/ kelly green color scheme I've been dying to use since I saw Zooey Daschanel wear it on her tv show. Thus, a skirt was born. 

....That was quite a long story about inspiration, but maybe sometimes hearing about inspiration is inspiring. 


Basic Skirt Info
About the basic skirt, it's just a classic gathered waist ditty, like Dana's or like the Lazy Days skirt without the ribbon hem. I did make one little change, and that was to make an extra wide casing at the waistband. I folded the top of the skirt down half an inch, and then 2 inches. I sewed at the edge of that bottom fold, leaving a space for putting the elastic in like normal. Then I stitched all the way around again, about 3/4" from the very top fold, no opening this time. Then I put in the 1" elastic and closed it up. This is what gives it that little ruffle around the top.

It's a size 10-12, see this size chart for measurements.


Fabric
The priants on the pocket are from the super fun Summersville line by Lu Summers. I can't get enough of those designs.

The main fabric is really special. It's by an artist named Marcia Derse, who I had never heard of before I stumbled across her booth at a recent quilt festival in town. I was smitten with the color and painterly look of this print. Good thing I still have a yard left for me!


Pocket
Ok let's make this prairie pocket! No, ummm, a metro pocket because that sounds much cooler.


Cut two 10" squares of fabric for each pocket. Place your first piece wrong side up and bring two corners together, so the wrong sides are facing. Press.


Bring the two corners that are at either end of the fold together so that it's a triangle with four layers now. Press well and repeat on the other piece.


Cut two pieces of binding fabric, each 2.5" x 12." These do not need to be cut on the bias. One at a time, fold the long edges together and press. Then open up and fold the long raw edges in to meet that middle fold you just made. Press well.

Now open up all the folds. On the back of your folded triangle, pin the long raw edge of the binding to the raw edge of the triangle, right sides together. Stitch right inside of the fold that is closest to the edge. 


Turn the whole thing over to the front side and refold the other raw edge of the binding into the middle. Trim the short edges of the binding so they just extend a little bit past the corners of the triangle.


Fold the corners of the binding inside like this on both sides.


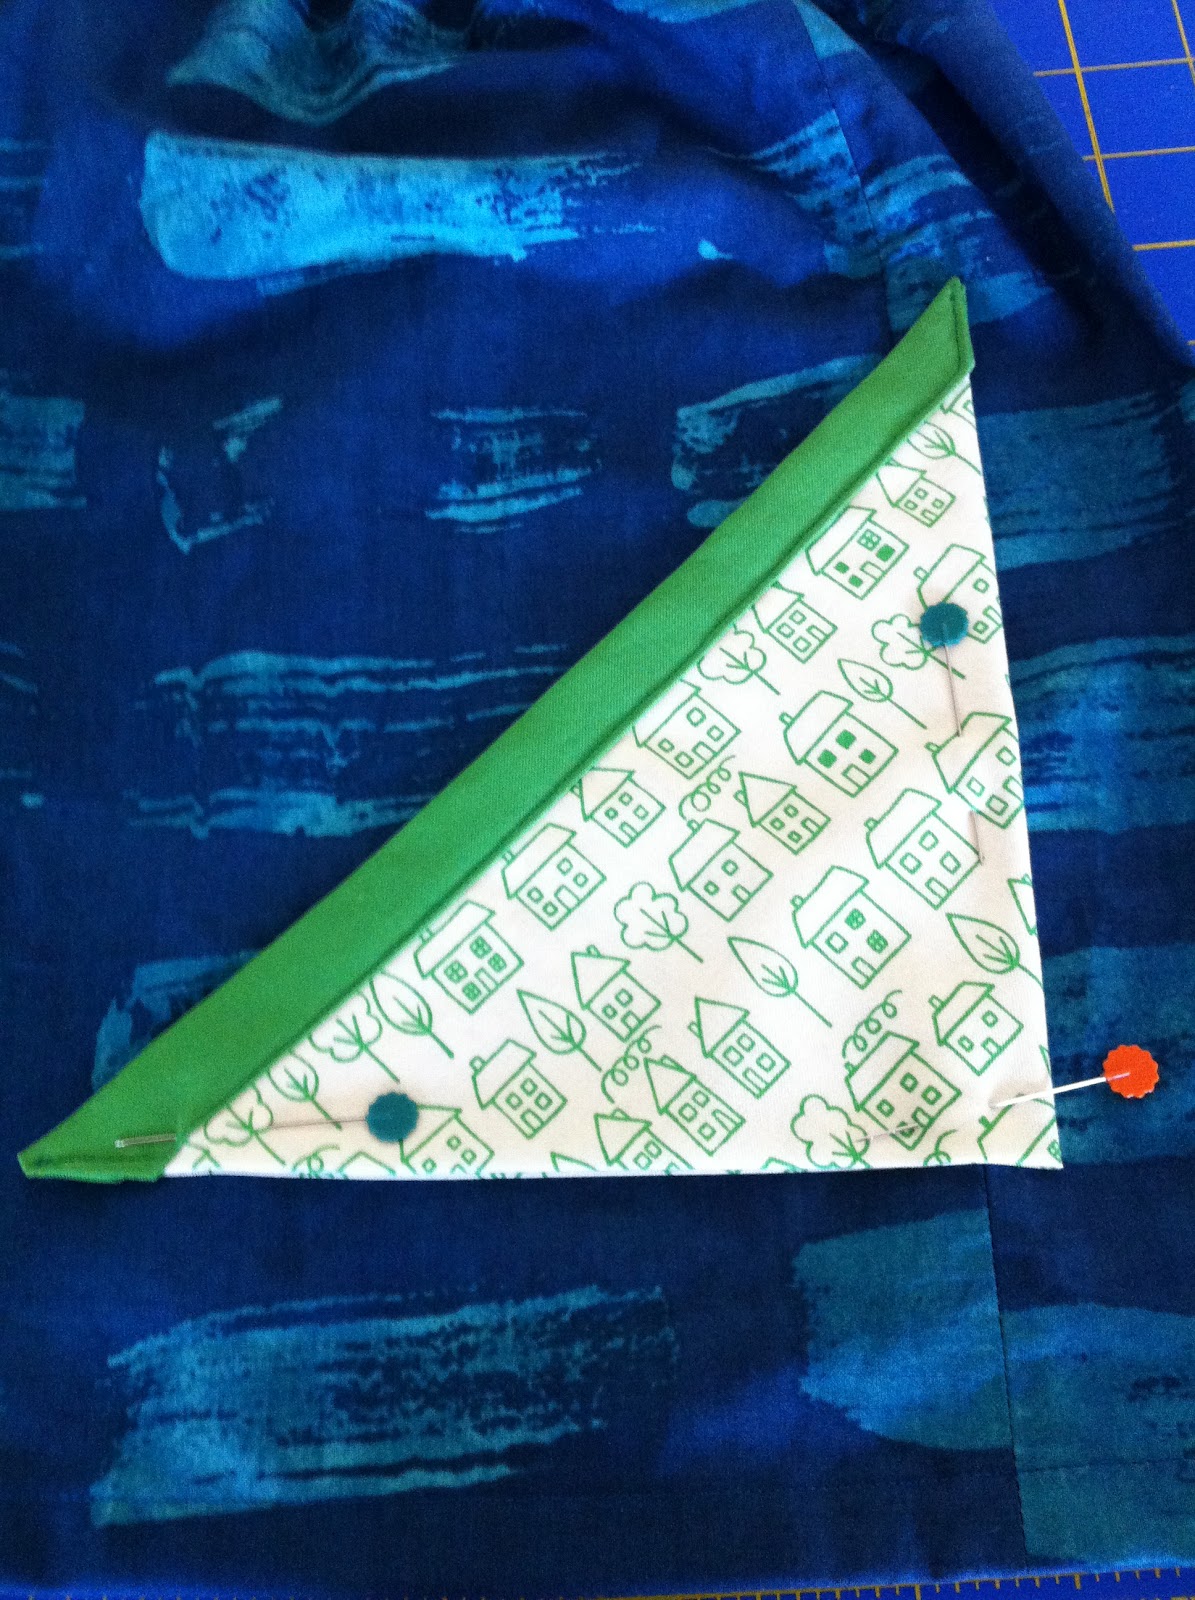
Then bring the fold over and pin on the front of the triangle so that the binding covers over your last line of stitching. Start at the very left corner, topstitch down the edge all the way to the other corner, pivoting where the fold in the binding does.

Repeat the binding steps on the other triangle.


Layout both pieces on the skirt to see exactly where it looks best. I placed mine 2.5" from the hem, and overlapping the side seam by half an inch.


After figuring out the placement, take off the top layer of the pocket and pin the bottom triangle in place. Start at the bottom corner and edge stitch across the bottom and to the top corner. Be sure to backstitch at these corners to reinforce.


Now place the top triangle back in place, but pin it about 1/8" below the bottom of the other piece. It would be too many layers of fabric to stitch thru if it was places directly on top. Edge stitch this piece on the side and bottom, and your pocket is complete.


I chose to make one oversized pocket on this skirt, but all you need to do to adjust pocket size is change the size of your original fabric squares. I can't wait to put these pockets on so many other things- dresses, tunics, shorts, a purse, anything!


Have fun with these pockets, and don't forget to check out the rest of the cute skirt tutorials on Project Run & Play!


Monday, June 11, 2012

Perfect Striped Pockets With Flaps Tutorial

(This is another re-post of one of my Project Run & Play tutorials. See the entire "Howl at the Moon" look right here.) 


Hi, it's Jessica from A Little Gray, and WOW- I'm so happy to be back here to share a tutorial this week! I feel especially proud that a boy look won this challenge. I am more comfortable sewing for my boy Hendrix any day- this girly stuff is still pretty new to me!

Details are really important in boy clothing. Things like pocket flaps and contrasting topstitching go a long way on a pair of pants, and simple additions like bright stripes kick up the wow factor. So that's what I'm going to show you today.


You'll need a main fabric, two or three different colors for the stripes, and a lining fabric. I'll show you how to make one pocket, but of course the amount of fabric required depends on how many pockets you add. My "Howl at the Moon" pants had 4 pockets in this size, 2 on the back and 2 on the sides by the knees. 

First we'll make the striped patch pocket:

Cut each stripe to 1"x 5." Cut two pieces from your main fabric to 2.5"x 5." Cut one piece from the lining fabric to 6"x 5." Piece the striped front of the pocket together using a quarter inch seam allowance and press seams open. 


Pin the front of the pocket to the lining with right sides together. Stitch around the outside with a half inch seam allowance, leaving a couple of inches open on a shorter side for turning. At the beginning and end of this seam, stitch into the seam allowance right up to the raw edge, like a little tunnel for turning. This makes it much easier to get the seam allowance evenly tucked inside whatever you are turning. Clip the corners off, trim seam allowance to 1/8" except at the opening, turn right side out. Use a chop stick or turning tool to poke the corners and edges out while pressing.


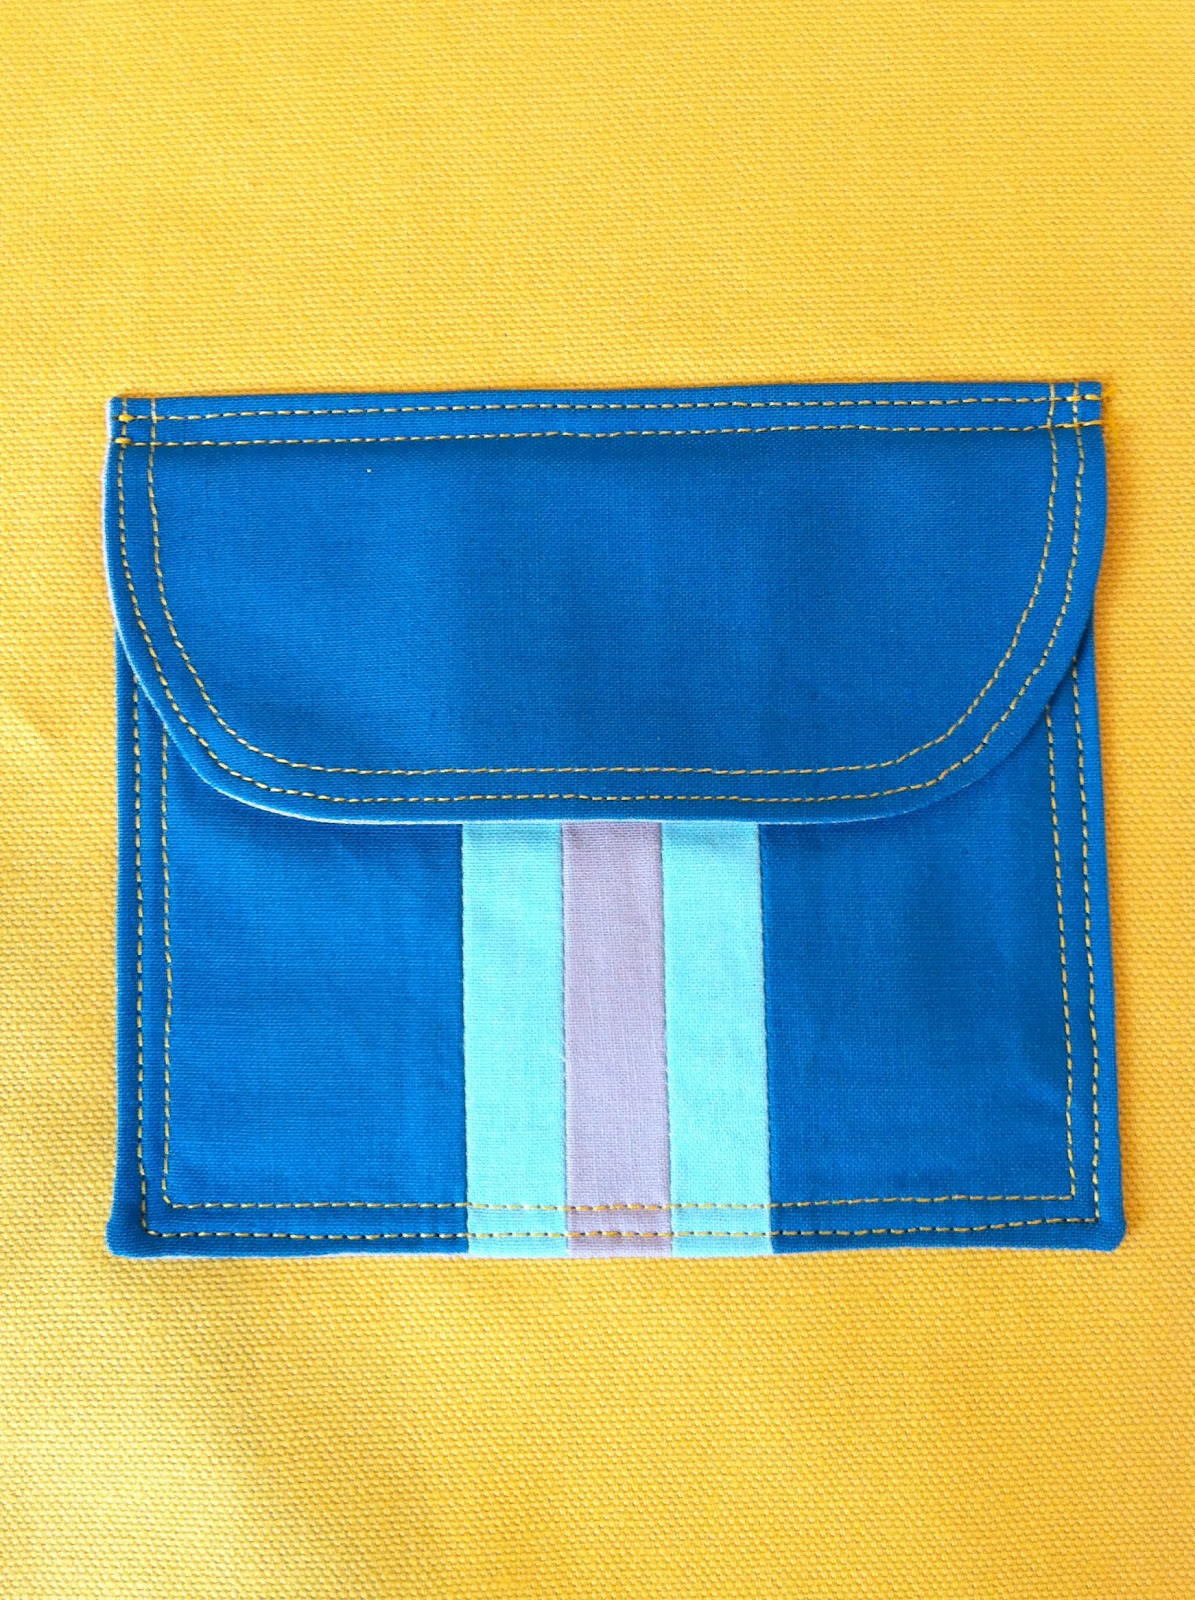
Topstitch around the whole pocket 1/4" from the edge. Then pin in place onto the garment exactly where you want it. (I'm just using this scrap of yellow canvas for our example.) 


Topstitch around the sides and bottom 1/8" from the edge, leaving the top open and reinforcing at the beginning and end. 


Now we are ready to make the flap:

First make your flap pattern piece. I like to use freezer paper for my patterns, but use whatever paper you have on hand. Cut a rectangle to 6"x 3" and fold it in half so the short sides meet. Cut off the bottom corners so they curve gently.


Use your pattern to cut out one from the main fabric and one from the lining fabric. 


Pin right sides together and sew only around the curved edge with a half inch seam allowance. Leave the entire straight edge open. Trim seam allowance to 1/8," turn right side out through the top of the flap, and double topstitch the curve at 1/4" and 1/8." 


Now pin the flap onto the garment right sides facing, so that the straight open edge is just slightly above the top of the patch pocket. 


Sew it down 1/4" from the raw edge and then carefully trim the seam allowance down to 1/8."


Fold the flap down, press, and double topstitch at the top, and that raw edge will be enclosed underneath. If you'd like, you can add bar tacks at the top corners to keep the flaps from sticking up like I did on the original pants. 


Your professional looking pocket is done and ready for action!