Showing posts with label How-to. Show all posts

Friday, May 20, 2011

Tutorial: Spool Stacker Toy

If you are here visiting from The Long Thread, good morning and welcome! (I guess the rest of you are welcome too.)

The Long Thread was one of the very first sewing and craft sites I ever found and checked in on regularly. Ellen is a sewing guru, and her site is fun and stylish. So when she asked me to participate in her HandMayde series this month, I was pretty excited.


This week is all about kids. Today I'm sharing a project that your kid can help you make, and then play with long after. And you get to repurpose all those empty thread spools.

If you are like me, you hang on to all your empty spools and have no idea why. Mine have been collecting in a little pile by my sewing machine for some time. Not you? If you are not that neurotic, then start hoarding now!

And if your two-year-old is like mine, he loves his old wooden (or plastic) ring stacker toy, but it's become way too easy for him to do. This version is more of a challenge to toddler coordination, and it adds color-sorting to the fun.


So let's get started.

You will need:
1. Masking tape
2. Contact paper
3. Kid paints (4 colors) and paintbrush or sponge
4. Chunk of wood at least a couple inches deep. Mine is 2 x 10 inches. You can use what you find or buy a piece from the craft store.
5. Four wooden dowels small enough to fit thru your spools. I bought this six pack of white ones at Michael's for a couple bucks.
6. A drill
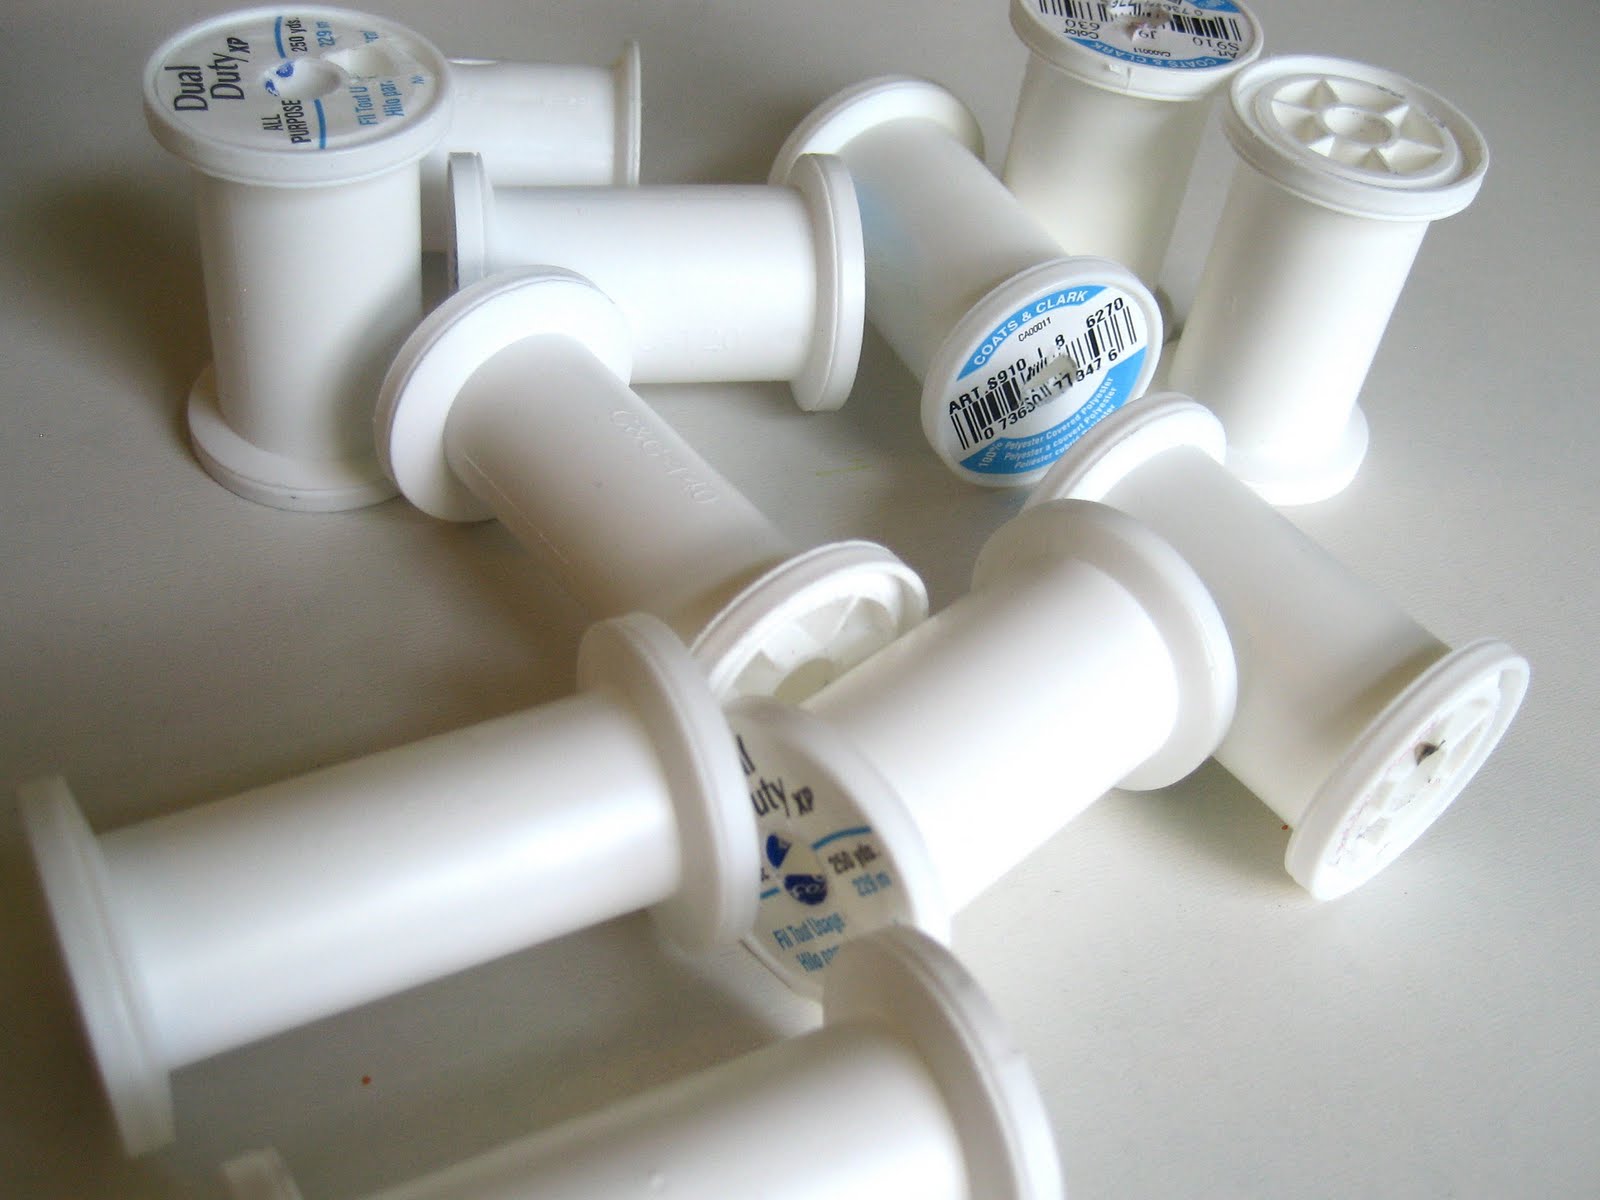
7. Plastic thread spools, I used 12.


Paint: This is the fun part your kid gets to help with. To prep, cut 4 pieces of contact paper about the size of notebook paper. On the side that is the top of the actual contact paper, not the backing, stick down 3-4 long strips of masking tape. We are using the contact paper for this because it will be easy to get the masking tape off after it's painted. Tape the sheet down to your work surface (I use an old cutting mat for messy things like this.) and let your kid go to town painting, one color on each sheet.


Help them to cover the tape strips pretty well. Hendrix only made it through the first three colors before losing interest, so I finished up the yellow for him. He hates yellow anyway, it's the only color he refuses to learn! (I originally did 5 strips of tape, but discovered you really don't need that much.)


While he was painting those, I was also painting the dowels in each of the colors we used. 


Drill: Next put four evenly spaced holes in your wood block about halfway through. (Who am I kidding, I had my husband do this.) Make sure your holes aren't too big to hold the dowels snugly. You don't have to be too precise about the placement, just be sure they are far enough apart that a spool could be on each one and have space in between.


Decorate spools: Take all your lovely naked spools and remove all the stickers off of the ends.


Make sure all the paint is completely dry and then you can peel up the masking tape easily, and it will still be very sticky.


Wrap up the spools, making 3 in each color. I think the texture of the painted tape is pretty cool looking. 


How fun do all these colorful new stacking blocks look?


Stick your dowels in the wood and the new toy is ready for stacking and sorting. Hendrix has loved playing with his all week. (Of course, I supervise so that he doesn't have any bright ideas like using it as a landing pad while jumping off the couch.) He's always very proud after he successfully gets all the spools on.


I've also been thinking of some fun ways you could use tape painted this way- pretty packaging and gift wrapping, kid-art displays, rotating photo galleries, more colorful memos and reminder notes... I'm sure you could think of lots more. It's a good alternative to shelling out the cash for specialty tapes. 


Thanks for reading everyone, and have fun with your repurposed spools and pretty painted tape!


Wednesday, April 13, 2011

How To MacGyver Some Cupcake Toppers (or fun with Post-its)

I don't know if I mentioned we were having a party for H's second birthday this past Sunday. Well, we did and it was super-fun for the all the kids because it was at a nice playground on a sunny day and there were pizza and cupcakes. What more does a kid need?

Me, being very much with child, I did not have huge amounts of energy or expectations for cutesy extras surrounding said party. But, in my mind a kid's party at least needs some kind of banner marking the honoree, and something dressing up the tops of the cupcakes. Those two simple things go a long way in dressing up the celebration, so that was really all I attempted in that vein.

Lacking money as well as energy, I was determined to use only things I had on hand already. I went to print out some cupcake topper freebies, only to discover I needed new ink cartridges. Hmm, not going to spend $50 on that this weekend. So I came up with this little Post-it note version, which worked well with his favorite colors green and orange.


With the sticky part on the left side, insert your toothpick in between as you fold the paper down. I cut a little length off. I then added stickers that spelled out "happy birthday."


Turns out, Sunday was WAY too windy to set cupcakes out on a nice display or even bother with my little flags, so we just kept them in the box. Turns out, cupcakes are still delicious without any paper decor on top. Oh well, I still thought it was a good idea when you don't have access to a printer.

Obviously, it was also much to windy to hang up a banner outdoors, but luckily I only made it say "Hendrix" and nothing pertaining to his birthday, so maybe I'll still put it in his room for a while.


Yesterday, he and I had a little more fun with the pad of post-its. It's almost like he was trying to make a message.... crazy huh?  :)


Moral: When crafty cutesy plans fall through, it doesn't really matter. Also, sometimes it's fun to stick paper all over the wall. (Like this.)


Wednesday, February 16, 2011

Double Potholder Tutorial


If you aren't completely sick of potholders by now, you might want to make this useful 2-handed version. Like I said, I am no genius for figuring this out, it's just a variation on Prudent Baby's prettty potholder. 

I particularly like it for holding onto the handles of the pots that I have just boiled pasta in as I take them over to the sink to drain... Or even handling pretty dishes of shrimp pasta from my husband's restaurant that aren't really hot just for a photo.  :)


Gather and cut supplies. You need:

One piece 24"x8" terry cloth. You could use an old bath or dish towel for this if you want.

Six pieces 5"x8"- 2 in the terry cloth, 2 quilt batting, and two in the pretty fabric you want to use. This top layer could be any manner of patchwork or piecing. Also, if you don't have batting lying around, don't sweat it, just use another layer of terry.

A package of double fold bias tape, I used 1/2 inch.


First quilt together the layers of your two outside pockets, terry on the bottom, them batting, then fabric. If you are doing an applique in your design, like I did with the fork and knife version, first do that on just the top layer. Then quilt it to the others. For that pink one, I stitched around the design on the fabric. Here, I just did lines about 5/8" apart.


Place your pocket pieces back on the long piece so you can figure out which edge you want facing in, which are the edges that need bias tape. This might not matter to your design, but for instance if you want to have a fork on the left and a knife on the right, you don't want to mess this up. Cut strips of bias tape about 8" long for these inner edges.

Now, if you don't know how to attach bias tape, I definitely could not explain it any better than Prudent Baby (have I mentioned I am bound to love them forever and ever now?) or MADE already have. Both make it really easy to understand. Go. Learn. Do.


Now you have bias tape on the inside edges of the pockets. Pin the corners back onto the long piece. The time has come to attach more bias tape all the way around the whole thing.


You can do the corners however you like, but I like them rounded. I've found that it's easier for me to leave them uncut like this, then pin the first side of the tape down in a curve.


Then I sew and then cut the corners after, so that all the layers are even with the edge of the tape. Stitch down the other side of the tape and you are done.


You can attach a loop in the very center on the top side if you want. Or you can bypass a loop altogether if you plan on hanging it over your oven handle like a regular dishtowel.

Have fun holding hot things with not only one hand, but TWO!


Thursday, August 5, 2010

corky-cork and the funky cork board


I made this for my friend's birthday last weekend. He is really into wine. (Sorry about the picture, someone is in a very tactile time in life.) So my first instinct was to buy him some nice wine, but I was a little intimidated by the prospect of picking out something he wouldn't poo-poo. Not that he is snobby enough to poo-poo, but he is someone who knows about tannins and can smell notes of nutty gooseberry and coconut sausage...

So, I turned to my beloved one pretty thing search box. I always start there when searching for gift ideas. There I found this inspiration from Apartment Therapy. I just happened to have a bazillion wine corks because my husband is a bartender and has been bringing them home from the restaurant for quite some time. I always complained about this and said I had no idea what we would do with them. So yeah,  I'm pretty much always right about things like that.


I did mine a little differently though. First I found the frame we already had in a closet and spray painted it red. Then, the apartment therapy version suggests getting a wood board cut to the size of your frame at the hardwood store, but I didn't have time for that. So I just cut a piece of cardboard to fit from a Pampers box. That, with the cardboard backing the frame already had, seemed like it would be sturdy enough.

Then I just started hot-gluing. This picture shows my first round, then I just worked my way in from there. I had to cut corks to make them fit sometimes, but they cut very easy with an exacto knife.

When I finished, I stuck some tacks on it, along with a couple blank list sheets I printed out entitled, "Wines to try." I really liked the way it turned out. I hope he did too. I know a cork board isn't the most exciting gift for a man, but I think he thought the wine part was cool. Anyway, making stuff for guys that they will actually like is hard! I still have never sewed anything for a man. Nick always asks when I'm going to make him something. Then I remind him of that one time I made him an omelet. Oh, and that small person I made in my uterus.

So has anyone come across any good tutorials or ideas for guy gifts? I'd love to hear in the comments!

Tuesday, April 27, 2010

Stenciled Toy Box

I bought this toy box for H a while back at Ikea, but it was plain white.

Here is the before, with ALL the toys taken out. (He will ignore the toys until I start to put them in, then he suddenly wants them out. It's a fun game.)

Today I decided to personalize it a little using contact paper stencils. I just traced the letters and designs I wanted right off of my computer screen onto paper, then taped that paper over contact paper onto my cutting mat, and cut through both layers with an exacto knife. It's very simple to make a stencil for anything this way, as long as you make sure you put the sticky side of the contact paper down (which I didn't remember the first time, so I had to cut out his whole name over again. Oops.)

Here's the simple outcome...


I used acrylic paint and it did bleed under a bit, but it actually gives it this really cool distressed effect that I love. And the swipe of the sponge brush almost looks like wood grain.

I got the fox shape here. It's a papercutting blog with lots of really cool templates. Papercutting is on my very, very long list of things to try. Anyone trying any new crafts lately?

Monday, April 19, 2010

Plate Wall! (with how-to)

I've wanted a wall of plates ever since I saw this one on Lena Corwin's blog.

Mine isn't quite this epic, but it is very nice on my little apartment kitchen wall, I think.

Here's how I did it:

First, gather supplies. Your plates of course, and an equal number of plate hangers. These on the left are from Bed Bath and Beyond, and they are cheaper than the others I got from Michael's. BUT, the hook on them is so long that you can see the nails peeking out above the plates. Not a big deal, just a word to the wise.

Go ahead and stretch the hangers over the plates, then arrange on the floor until you come up with something pleasing to your eye. I didn't want mine to be too symmetrical, so after much trial and error, I settled on an arrangement. The ones with the vintage camembert labels I got at Jungle Jim's, and the other three I found on clearance at Anthropologie. (Does anyone else have to go straight to the sale table in the back when they go in that place? I pretend I have horse-blinders on until I get back there, so I don't let the covet-monster get me.) Of course, you could also make a great, cheap plate wall if you take a little time thrifting. I just couldn't resist all these bright colors since I can't paint my apartment walls.

Then I cut out paper circles the same size as my plates and taped them to the wall in that arrangement. This really helped me get everything in just the right place. Next, I nailed in all the little hooks, right below the tops of the circles. (I even did all the nailing myself instead of wussing out and asking Nick!)

Finally, exchange your paper circles for pretty plates, and admire. (Yes, I have one of the old rolling dishwashers you have to hook up to the sink.)

I love it. And I have room to add more if I want.

I don't know if you can see, but those flowers have little numbers in them, like a paint-by number.

Design Sponge also has a helpful video about hanging plates that you can see here.


I also wanted to show you another little DIY I made for my kitchen a long time ago, my vintage record sleeve organizers:
We have next to no counter-space for mail and coupons and such, so these are great, and so easy to do. The how-to is right here. The only thing I did differently was glue a pretty sheet of scrapbook paper to the back of each one's pocket.

Saturday, April 10, 2010

Photo Booth Felt Mustache How-to

Last night was HG's big birthday party, and it was so much fun! One thing we did was set up a "photo booth" area with a backdrop (old sheet from goodwill) and various props. This is not my original idea, I think I first saw the "smile booth" at Our Labor of Love, and then I saw the idea used again at Simply Radiant. (This yellow party actually inspired me a lot, as you will see in future party posts!)

But as I was gathering supplies for a little prop box, I think I did come up with an original way to make those adorable felt mustaches every "hip" photographer is using lately. (Actually I believe the originator of the mustache-on-a-stick craze is here.)

I didn't have any sticks lying around, and I did have elastic, but that seemed uncomfortable. Then I remembered that I had a bunch of white cloth-covered floral wire- Eureeka!

So here is the mini-tutorial:
Draw up a little mustache design you like (or find one on google) and cut out 2 from the felt. Also cut out a smaller piece, kind of bow tie shaped. Stick the two mustaches together with craft glue. Then put glue on the small piece and stick it in the center, with the middle of the wire sandwiched in between.

This is what it looks like from the back. Let it dry, and the wire wraps comfortably around your ears- you can barely notice it. Which is great, because of course you will want to wear your felt mustache all the time. To work, to school, to the movies, to the summer music festivals...

One for every day of the week.

"Mom, what the deuce is going on with your face?"

"Seriously, take that thing off- I don't like it."

"Ah geez, they got Nana and Grandpa too!"


***See the rest of the party here! ****

Thursday, February 25, 2010

T-Shirt Makeover- Quick and Granny

The whole granny-chic thing has been around for a while now, but doilies have really taken the spotlight lately. (Have you seen the Megadoily?!) I've been itching to stick some doilies on everything, so I was really excited to see a bin of little 99 cent ones at Joann's the other day. (I know, it would be much cooler if they were actually vintage doilies, but whatever, we're faking cool here.)

Today, I realized that they belonged on this $5 Target tshirt I had. Here's what I did:
First, layout the doily arrangement on the shirt. I ended up trying the shirt on to do this, which was really helpful in showing me that my original 3 doily plan would have looked like way too much on me. 


Take shirt back off and loosely pin everything in place. 


Now turn the shirt inside out and put a scrap of fusible interfacing over the doily area. Make sure the fusible side is down, and draw the general shape of where the doilies are, maybe even a little bit larger than where they are. 

Cut it out. Then take off the doilies so you can iron down the interfacing. (If you don't have interfacing, you could try this project without it, but it really helps to stabilize the stretchy tshirt material so you don't end up with something heinous that makes you curse your machine and never try sewing ever again.)


Turn right side out and pin the doilies back in place. Make sure you pin any parts that fold down under the collar well. Stitch in place. I went down the edge of the collar, back around the outsides of both doilies, and then stitched a circle closer to the center of each one. I tried to stay on the chunkier parts of the crochet so that you don't see as much thread on the shirt. 

Trim loose threads and that's it. Go have a cookie. 

Now here's a picture-of-myself-in-the-mirror-with-the-camera-blocking-my-face-shot for you:
I like it with a cardigan. Now all I need is spring.