Showing posts with label re-purposing. Show all posts

Friday, April 27, 2012

PR&P Week 3: Sheet to Chic

This week the Project Run & Play theme is Earth Day. The challenge involved using all Earth-friendly materials. 

The journey of making this little outfit took approximately 18 twists and turns over the last week. Kristin and I keep talking about how we can totally understand how the designers on Project Runway get so dramatic and crazy. That was me this week. (As if this is even near the amount of pressure they feel. They get like 3 hours to make couture and they have to do it on camera. I'm totally crying them a river.) Anyway, I like where it ended up, but MAN I'm I glad to be done with it!

First I thought I would just go the thrift store and find some materials I would be inspired by. I went to one Goodwill, felt pressure to leave because of my kids being crazy, and just grabbed a couple things. When I got home I realized I hated them- what was I thinking? Wasting $15 on old clothes you don't want to use is not a good spur to creativity. (Goodwill is so expensive lately!)


So I decided it would actually be more of a challenge to make something beautiful out of a grody old sheet that was in my closet. I didn't want it to look "upcycled" from old clothes, but I wanted it to be stylish and little vintage-inspired.


Then I saw this photo here. I loved it. I don't know how they did that effect on the bodice but it's pretty crazy awesome. I figured I had a whole lot of fabric with a sheet right? So I'll just make a boat load of tiny 1/8" bias tape and do it that way. Hmm. Not as fun as it sounds. 


As you can see, my embellishment does not really live up the original. I don't think it was bias cut fabric they used, because I certainly could not make it behave that way. So please don't think my design lame after seeing the original, but this is how inspiration works I guess. It's always fun to see where people's ideas come from. 

The color of the dress was also not my original intention. I had to use color remover on the sheet, which started as dingy blue/gray. Then I bought "grapefruit" fabric dye. I thought it would be much brighter than this. I even dyed it again and it was still pretty pale. It took me a good two or three days to cope with this color, but now I love it. It fits the baby and fits the dress. 


Once I coped with the color, I had to throw in some fabrics that were more "me," and I think they all play nicely together. The lining and underskirt are Berry Bush, from Cloud 9 organic fabrics. It's from Sewn Studio of course. Sewn actually has a pretty nice little selection of organic cottons, which is really nice to have available. The leggings are from an old knit top of mine from Urban Outfitters that I hadn't worn in forever. The color and print are so cool. I love these leggings and she'll be wearing them a lot. (You can't see in the picture, but there is actually a wolf on her left leg. What is with me and the wolves??)



The buttons are my favorite favorites. They are for reals vintage from my mom's grandmother's collection.  They make the whole thing feel special. And the pin on the shoulder is the perfect accent. I bought it at a local boutique, the Spotted Goose. 


Here's a nice picture of me looking blurry and concerned about a half-second before Elsie fell on her face during the photo shoot because she was running around so fast. Nope, wait, that's not why... it was because I bought her shoes for this outfit that were too small and they made her fall. That's why she is mostly shoeless in the pictures. Just do me a favor and imagine her wearing some amazing vintage white leather moccasins that we have but were also too small for her little potato feet. Geez babies, it's hard to keep you eco-fashionable with all the constant growing. 


By the way, Elsie's daddy took the pictures this time. Aren't they fantastic? 

Vote for your favorite Earth Day look right here. 


Tuesday, March 22, 2011

A Dress a Week #4

Last week, I got out Hendrix's big tote of 0-6 month clothes to pull out what I could use, or alter to use for a girl. It was nostalgic and sweet to look at his tiny teeny items, but it also confirmed my suspicions that yes, little girl clothes are generally more fun. 


So I made a couple of dresses from nautical-looking onesies of his. This one's skirt was made from pieced old t-shirts. It was inspired by this version, although I put mine together differently. I love the stripes and colors, but when I first attached the skirt, the front of that seam was really jacked up. I was able to pick it out and fix it, but you can see where the old stitches were on the cheap onesie material if you look closely. It's still cute enough for my own kid, just enough of a screw-up that I wouldn't gift it to someone else's kid. 


When I made this second one, I followed Prudent Baby's instructions for attaching the skirt, which made about 159 times more sense. Then I added the purple ribbon just for extra flair. It's her super-hip, mixed prints, chevron and strips outfit. 


And then I couldn't resist sticking Florence Henderson on a onesie, of course. This is what was on that yellow tshirt I used for the anchor dress. It also said "Florence Ya'll" above her face, (you locals might appreciate that) but the words wouldn't fit. This onesie really makes me smile. Hopefully my daughter will grow in a natural mullet like that. 


Thursday, February 17, 2011

Sweater Swiffer

Today my kitchen floor DES-perately needed to be cleaned. You know, like I-can't-stand-this-one-more-day-disgusting. Armed with extraordinary motivation for such a hated task, I set out to gather my supplies and quickly realized that we were out of Swiffer pads.

So I went into my closet and grabbed this textured blue sweater that I knew I would never wear again. Then I made it into a swiffer, kind of like this. Took about 5 minutes.


Isn't it lovely and annoyingly color-coordinated? Worked like a charm. Sewing is handy.

That is all.


Wednesday, February 9, 2011

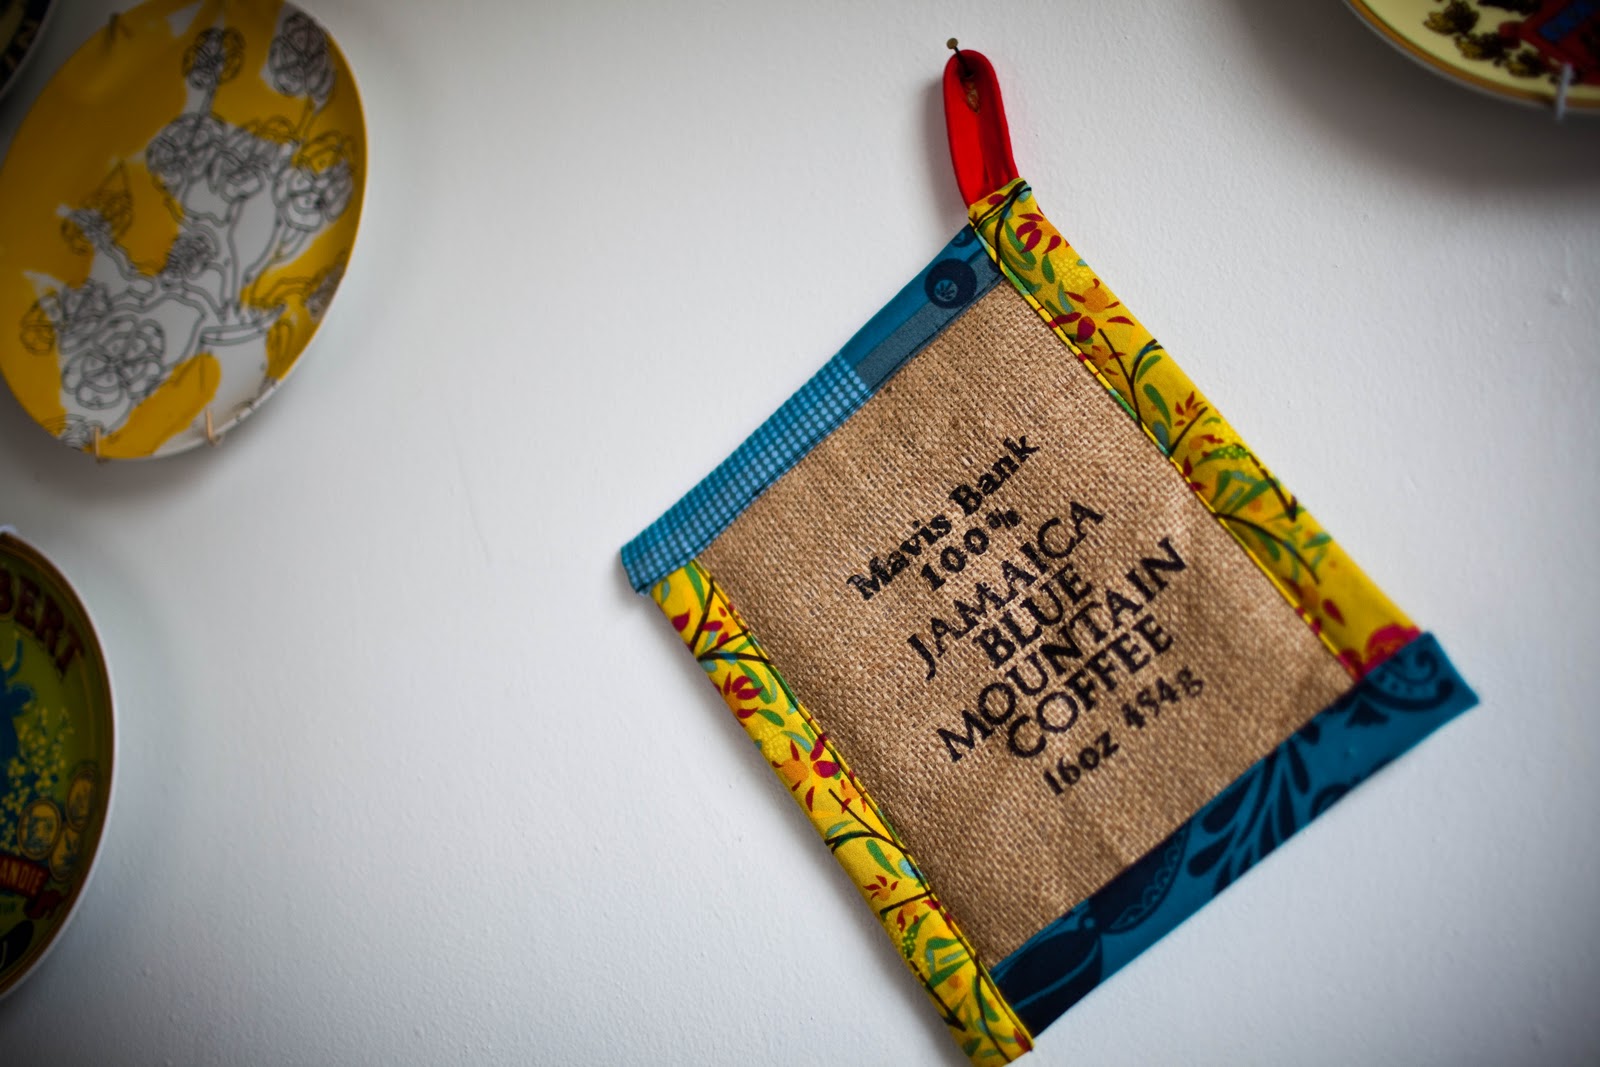
Second Potholder Entry

I ended up getting 4 entries done in time for the sewing machine contest! It was really fun, and if nothing else, I got lots of bias tape practice. 

Nick and I had a fun photo shoot with all of them this afternoon during H's nap, and I really think the pictures will help me with style points. He is really talented. (He dabbles in wedding photography with Nathan at Fyrefly Photography.) And on a side note about Nick, he was a little worried that I painted a picture of him as a tyrant husband when I said he was going to "let me sew" all day Tuesday. Of course, that's not the case and he would be happy for me to sew anytime I want to, and I just meant that he had kindly offered to be completely in charge of Hendrix all day so that I was freed up, but I'm sure you knew that. Anyway, geeez, get out of my personal bizness. 

Here's my second potholder-

The embroidered piece is one of these linens I got at an antique market. Then I freezer-paper stenciled the bird (Put a Bird On It!) and quilted all the layers together. I'm a big fan of this one.


And here's the money shot for my first entry-

Much better than a phone picture, don't you think?


I have two more to show you later in the week, and there may or may not be a tutorial to go along with them. No promises from me, I can't even commit to a brand of toothpaste. 


Thursday, February 3, 2011

Winter Boredom Busters #3 & 4: Magnets and Marshmallows

Neither of these are new ideas, but they are nice because you may have what you need on hand.


I grabbed a spare cookie sheet (my husband decided to buy 2 one day at the store, even though we don't bake cookies ever) and a bunch of old flat magnets off the fridge. I also had this stained glass looking contact paper in my craft stash. I think I got it at a thrift store a long time ago, kinda weird. I stuck the magnets on the sticky back and then cut them into random shapes.

I guess I was thinking that Hendrix could be all artsy and make want he wanted out of the abstract shapes.


Which was fun, but I think he might tire of this quickly. In the near future I may reuse the magnets and glue actual shapes and recognizable things on them, made of colorful felt or craft foam. I think he would enjoy making scenes with animals and other things he knows a bit better.

There are really tons of variations on this one. Here's a magnetic scene I created for my niece last Christmas complete with paper doll outfits. In college, I was an education major and I did a project where I recreated scenes from kid's books by copying the pictures out the books, cutting out and laminating, and then smacking some magnets on the back. This would be really fun to do with your child's favorite books if you have access to a color copier.


And then there's the tried and true classic, marshmallows and toothpicks. This is Ryan, who is three and quickly exclaimed, "I love this!" a couple minutes into the fun. He had brought the supplies home from preschool with him on a day I was watching him and his sister, so we did it when the younger ones were napping. I don't know how well it would go with someone Hendrix's age, but we might try it before the winter hibernation is over.


I've seen several other bloggers with winter boredom on their minds. Here is a post from Mini Eco that has a ton of ideas just in the comments. (Plus her site is full of really fun stuff, you should look around.)
And if you like the artsy activities, have you seen The Artful Parent or No Time for Flashcards yet? Tons of things to do.

So it's still the dead of winter and 27 degrees, but on the bright side:

  • The sun was shining a lot today.
  • Hendrix is now accepting after-nap videos which aren't Fantastic Mr. Fox. (I love that movie, but we must have watched it every day for a month.)
  • The Superbowl is Sunday, which I don't care at all about of course, but it's a good excuse to have a party and make yummy appetizers. What are you making?
  • It is now February, which means March is next, which means April is after that, which means warmth, the Reds, and a baby girl!


Tuesday, August 17, 2010

Antique Market (I Like Old Stuff)


Sunday morning we headed down to Burlington, KY, just about a 20 minute ride, to the Antique Market. They have it on the fairgrounds there every third Sunday of the month. Dealers come from all over the place, and it's huge! And everything was beautiful, or had the potential to be- I was in heaven. I could have spent a lot of money there (even though the prices were very reasonable.) I snapped some pictures of stuff I loved but didn't have room for. After just a little while, it was no use, because I wanted to take pictures of everything. Here are some of my favorites.

I actually regret not getting these canisters. They are so adorable!


This would be perfect for Hendrix with just a fresh coat of chalkboard paint.


I'm usually not that into the old Coke stuff, but this tray was so cute. 


If I knew how to knit, I definitely would have snatched up this basket of fabric yarn. In fact, I considered buying it and worrying about learning to knit later :)


The perfect color.


I loved these huge spools. I'm sure there are some really great projects I could think up with the spools themselves. 


These next few pictures are the things I did come home with. How hip is this clipper ship necklace?


The lady said this necklace was from Spain.


The perfect little vase for my corner shelf.


And I'm not sure what I'm going to do with this set of embroidered cloths, but I just thought they were too pretty to pass up. These are like those sets your grandparents put on every piece of their living room, all the side tables and over the backs of the couches. I'll think of something to make with them- any ideas?


Thursday, August 5, 2010

corky-cork and the funky cork board


I made this for my friend's birthday last weekend. He is really into wine. (Sorry about the picture, someone is in a very tactile time in life.) So my first instinct was to buy him some nice wine, but I was a little intimidated by the prospect of picking out something he wouldn't poo-poo. Not that he is snobby enough to poo-poo, but he is someone who knows about tannins and can smell notes of nutty gooseberry and coconut sausage...

So, I turned to my beloved one pretty thing search box. I always start there when searching for gift ideas. There I found this inspiration from Apartment Therapy. I just happened to have a bazillion wine corks because my husband is a bartender and has been bringing them home from the restaurant for quite some time. I always complained about this and said I had no idea what we would do with them. So yeah,  I'm pretty much always right about things like that.


I did mine a little differently though. First I found the frame we already had in a closet and spray painted it red. Then, the apartment therapy version suggests getting a wood board cut to the size of your frame at the hardwood store, but I didn't have time for that. So I just cut a piece of cardboard to fit from a Pampers box. That, with the cardboard backing the frame already had, seemed like it would be sturdy enough.

Then I just started hot-gluing. This picture shows my first round, then I just worked my way in from there. I had to cut corks to make them fit sometimes, but they cut very easy with an exacto knife.

When I finished, I stuck some tacks on it, along with a couple blank list sheets I printed out entitled, "Wines to try." I really liked the way it turned out. I hope he did too. I know a cork board isn't the most exciting gift for a man, but I think he thought the wine part was cool. Anyway, making stuff for guys that they will actually like is hard! I still have never sewed anything for a man. Nick always asks when I'm going to make him something. Then I remind him of that one time I made him an omelet. Oh, and that small person I made in my uterus.

So has anyone come across any good tutorials or ideas for guy gifts? I'd love to hear in the comments!

Tuesday, August 3, 2010

Wanting to Work with Wood lately...

Here are three DIY projects that I saw on Ohdeedoh just today that make me wish I didn't suck so bad with a drill. Oh, and also make me covet a garage and some manly tools to go with it.


This Merry Go Round book caddy might be the cutest book organization ever. We have serious book chaos in our house. You will step on a Sandra Boynton if you spend any time here.


One of the best and simplest night-stand-turned-play-kitchens I've seen. I've already decided HG is getting a play kitchen for Christmas, and hopefully it will be one we DIY instead of one we buy. Too early to make any commitments though, so don't hold me to that one.  :)


And this kid chair is made out of two thrifted picture frames! GENIUS!! This one actually looks pretty easy to do, maybe I'll be attempting soon. Just add it to the list of a gazillion projects I want to try.

Friday, July 30, 2010

Tagging and Packaging

So when I opened my Etsy shop and made a couple sales, I was a little caught off guard. I realized I wasn't actually ready to ship the monsters I had made. Well, um... crap.

Luckily, I found a whole stack of old paint chips I had kept stashed from my days decorating children's church rooms. They are from this kid's line of Nickelodeon colors that Lowe's carried, although I don't think they do anymore.

At first, I tried painting over all of the Lowe's branding on the back sides, but that looked pretty awful, so I just glued two chips together back to back, in two colors that kind of match the monster they are on. Then I cover the cartoon characters with my shop name the monster name.


Here are 2 of my first sales ready to go.


They also get the little description attached on a laminated card. I hope to get these professionally printed down the road, but for now, they kind of add to the whole homemade look. 


Penelope was shipped out this morning. She was one of 4 new designs listed this week. You can read about the other 3 here.


Anyway, I love the bright paint chip tags, but I'm going to run out soon. I have some cute vintage owl playing cards I might use when that happens. I'd like to keep using repurposed/ recycled items. Does anyone else have any genius ways you tag your creations, or things you have seen other sellers use?

Friday, April 30, 2010

Refashion FAIL

sigh... I love the process of trying to change clothes that are in my closet just by using...clothes that are in my closet. But it's always just a make it up as you go- big fat gamble in the end.


Day 8 of the creativity project was to refashion some wardrobe item. I thought it would be the perfect opportunity for me to finally fix these 2 shirts with coffee stain right in the middle of them. (seriously, what is wrong with me?)


So it doesn't look horrible on the hanger...but it looks pretty bad on. It might look better on someone who is closer to an a-cup. But probably not. I really like the idea of the gathered panel, but I had to take it down too low to cover up that oddly placed stain. But I didn't have enough fabric to take it all the way to the bottom either. Plus the vertical panel kind of looks weird with the horizontal stripes. I'd like to try it again on a sold shirt with a lower neckline. 

I also attempted to redeem myself on the white stained shirt, but I just couldn't think of a way to cover that low stain that wouldn't look completely ridiculous. I might as well just wear it with a girl scout sash or something. :)


Monday, April 19, 2010

Plate Wall! (with how-to)

I've wanted a wall of plates ever since I saw this one on Lena Corwin's blog.

Mine isn't quite this epic, but it is very nice on my little apartment kitchen wall, I think.

Here's how I did it:

First, gather supplies. Your plates of course, and an equal number of plate hangers. These on the left are from Bed Bath and Beyond, and they are cheaper than the others I got from Michael's. BUT, the hook on them is so long that you can see the nails peeking out above the plates. Not a big deal, just a word to the wise.

Go ahead and stretch the hangers over the plates, then arrange on the floor until you come up with something pleasing to your eye. I didn't want mine to be too symmetrical, so after much trial and error, I settled on an arrangement. The ones with the vintage camembert labels I got at Jungle Jim's, and the other three I found on clearance at Anthropologie. (Does anyone else have to go straight to the sale table in the back when they go in that place? I pretend I have horse-blinders on until I get back there, so I don't let the covet-monster get me.) Of course, you could also make a great, cheap plate wall if you take a little time thrifting. I just couldn't resist all these bright colors since I can't paint my apartment walls.

Then I cut out paper circles the same size as my plates and taped them to the wall in that arrangement. This really helped me get everything in just the right place. Next, I nailed in all the little hooks, right below the tops of the circles. (I even did all the nailing myself instead of wussing out and asking Nick!)

Finally, exchange your paper circles for pretty plates, and admire. (Yes, I have one of the old rolling dishwashers you have to hook up to the sink.)

I love it. And I have room to add more if I want.

I don't know if you can see, but those flowers have little numbers in them, like a paint-by number.

Design Sponge also has a helpful video about hanging plates that you can see here.


I also wanted to show you another little DIY I made for my kitchen a long time ago, my vintage record sleeve organizers:
We have next to no counter-space for mail and coupons and such, so these are great, and so easy to do. The how-to is right here. The only thing I did differently was glue a pretty sheet of scrapbook paper to the back of each one's pocket.